Monday, December 17, 2007

bread & butter, or 100% whole wheat and lovin' it

First, I decided I love the Poilâne-style Miche I made last week. The BBA recipe notes that Poilâne thinks his bread tastes best on day 3 after the flavors have time to meld. The author, Reinhart, says he likes it 3 hours out of the oven. I agree with Poilâne. I didn't like it much on day one. But on day three, I kept eating more and more. The flavors were more complex and it had retained so much moisture. This is good bread.


it's flat and ugly, but oh, so good

Second, I had some leftover whole wheat from the miche and decided to try a 100% whole wheat bread recipe from Crust & Crumb, an earlier Peter Reinhart book (BBA author). It uses a poolish and has a pretty high water ratio to keep it moist and light, unlike most whole wheat bread which is really dense. Well, this recipe delivers what it promises. This bread is sooooo yummy, so moist, so flavorful; I can't stop eating it. It also has cooked brown rice, which makes for a fantastic texture. I've been eating it with huge chucks of this organic local butter shown below. At the time, I felt a little silly paying a slight premium for this butter, but it's totally worth it. Is there anything better than freshly baked bread and cultured butter?


I'll post the recipe soon, when I have more time (this is beginning to be a trend, aaahh!).

Sunday, December 16, 2007

falafel in no time


My husband brought me back a falafel maker from his trip to Jordan. I love that he thought to bring me a kitchen gadget. He's the best and so is this falafel maker. No more tedious quenelle forming and lots of uniform fried nuggets in no time. Ty said the cooks in Jordan would pop falafel into oil super fast, spraying oil all over their hands, making 100 in the time I make 10. I go slow and methodical, like all my cooking.


my son always loads up his plate when we have falafel and veggies

My son loves falafel so this is one of our favorite nutritious and easy meals: hummus, sliced veggies (carrots, cucumber, peppers), falafel, and pita. Sometimes I'll make a little diced tomato, cucumber, yogurt salad to accompany.

I can't easily get prepared hummus here so I started making my own, which couldn't be easier and is super yum. I use the Cook's Illustrated recipe. I get the Tahini at Reformhaus on Renweg or at Jelmoli near the Mexican food section. For falafel, I just get the powdered mix, available at most health food stores. You add water, wait a few minutes, then fry it up - remember 360F is the proper oil temp for frying.

Hummus

Makes about 2 cups, serving 8 to 10

(15 ounce) can chickpeas , drained and rinsed
1 medium clove garlic ,minced or pressed through a garlic press
3/4 teaspoon table salt
pinch cayenne pepper
3 tablespoons lemon juice , from 1 large lemon
1/4 cup tahini
1/4 cup virgin olive oil
1/4 cup water

Process all of the ingredients in a food processor until smooth, about 40 seconds. Transfer the hummus to a serving bowl, cover with plastic wrap, and chill until the flavors meld, at least 30 minutes; serve cold. (The hummus can be refrigerated for up to 2 days.)

Thursday, December 13, 2007

TGSE: Day Ten, kinda


pugliese, so pretty

OK, I missed posting last night because my bread wasn't done till about 1am and so I couldn't try it until this morning. I made pugliese with the sourdough starter. It was great! Of course, it was spiked with a little commerical yeast, so it was big and fluffy. The pumpernickel was my favorite, so moist and chewy. I will definitely work that into my routine. I still want to try regular sourdough and get it right. I also want to try some of The Bread Bible sourdoughs. But I just don't have the time right now. Maybe I'll wake up my starter again after the holidays. Now back to our regularly scheduled program...

pugliese, so chewy

Wednesday, December 12, 2007

TGSE: Day Nine

I'm starting to think this will never end and you and I both will be bored to tears come day 10.


my flat sourdough

That said, I made the basic sourdough and pumpernickel today. The sourdough tasted quite good, particularly as toast, but was quite flat. I don't know why. It rose fine but didn't pop in the oven like most breads. Perhaps the flour? I didn't use any vital wheat gluten. It also had a tight crumb, which I don't know if it should have or not.


my plump pumpernickel

The pumpernickel on the other hand, started out as sad, tiny lumps (I planned to put them into sandwich loaf pans as suggested in the recipe, but they were way too small) but plumped up beautifully during proofing and again the oven. I haven't tasted it yet as it is past midnight they still need to cool. So we'll see. The crust is really soft - is that right? I wish I could have a real perfect example of the bread instead of just a picture and description when I bake.

I shaped another miche tonight and will bake tomorrow. The first time I was lazy and used Ruchmehl instead of sifted organic whole wheat. This time I had organic whole wheat grain ground fresh for me. Then I sifted out some of the bran, as instructed by the recipe. I also halved the recipe so my KitchenAid could knead it. The texture is completely different, which is encouraging. I'm very curious to see how it tastes in comparison to the first loaf.

Must sleep...


sourdough after scoring


sourdough out of oven


moist, but tight crumb


buttery sourdough toast - yum

Monday, December 10, 2007

TGSE: Day Eight


I finally made the bread of the cover

I remembered why I don't make sourdough bread. Because I don't like sourdough bread. The bread was good and very pretty, but not what I crave. So after all that effort, it wasn't very satisfying. I'm still going to make the other breads this week, just to complete the project. We'll see if I like the others better. I'm tired and going to bed.


the gigantic dough proofing in my banneton


scored with my lame


this monster weighed in at 4 pounds

Sunday, December 09, 2007

TGSE: Day Seven

Oh, the suspense! I did not bake my bread today. Since I was having fondue tonight and wouldn't be eating this bread, I opted to retard the shaped bread in the fridge tonight and bake it tomorrow.

What did I do? Well, I added a ridiculous 32oz of flour to the firm starter and had to knead it by hand, since it was way too big for any non-commercial mixer. I'm not one of those "love to knead" people, especially with this unwieldy mass. I thought I was going to sprain my wrist. I gave up after 20 minutes, though it still wasn't really passing the windowpane test, and threw it in this 6qt container for a 4 hour rise.


after a 4hr rise, double trouble

Then I shaped it into a boule (or ball) and plopped it seam-side up in my banneton (proofing basket), which I haven't used in probably 3 years. Then into the fridge (I hardly had space considering my barm is taking up quite a bit of real estate). Tomorrow I take it out for another 4 hour rise, then bake. I can see the light at the end of the tunnel. I also made a firm starter for sourdough bread that I'll mix together tomorrow and bake on Tuesday.

I hope this basket can hold double this dough

Saturday, December 08, 2007

christmas market food

We visited the Einsiedeln Christmas market today and found some new food that we haven't seen before. It's always exciting to find something different than the ubiquitous bratwurst, garlic bread, Opelchüechil (fried apple slices), raclette, and roasted chestnuts.


this was the most popular food stand,
so we had to try it...


pork on a stick, with bread


real donuts are hard to find in CH
these were fresh, super yum and served with vanilla sauce


we were lucky with donuts - here's a second booth
frying up person-shaped berliners (jelly donuts)


it was cute and had a bit of jelly spilling
out the top of the head, like brains


we also saw egg nog, aka Eierkirsch
does that mean egg nog spiked with kirsch liquor?


and of course, the ever popular Glühwein
I wish they had a non-alcoholic version for us
teetotalers

TGSE: Day Six


I'm in way over my head. I started to read The Bread Bible's sourdough chapter and I'm overwhelmed. It's so much more complicated than I thought and I'm afraid the sourdough culture is going to start dominating my life. My life is already dominated by one baby, I don't need another. Plus, my fridge is too small to keep so much of this stuff around. I should really just throw away the whole thing and forget all about wild yeast.

Anyway... My barm has refrigerated overnight and is looking very healthy. I scooped out 1 cup to add to my bread starter. I decided to make a Poilâne-style Miche first, sourdough tomorrow, and pumpernickel on the third active day of the barm (all recipes from Bread Baker's Apprentice). After that, I'm going to probably just refrigerate it until after the holidays, then decide what to do with it.

Tomorrow, I will actually mix, shape, and bake the first bread. I'm excited!

Friday, December 07, 2007

TGSE: Day Five


It's alive!!! When I woke this morning, the seed culture was again busting out of the container. Yay! I just stirred it couple times yesterday, as instructed by Mr. Reinhart's recipe "correction," which adds oxygen to help the yeast along. So I was able to proceed with the barm today after all. It's sitting in the fridge overnight and tomorrow I can make the firm sourdough starter. The end is near.

In answer to Margaret's comment about throwing half away - yes, it feels like a big waste. It took 4 cups of flour to yield one cup of seed culture. Instead of throwing away half, I could have put it in a separate container and maintain both. But since you have to divide the seed culture every day and the barm every three days, it starts multiplying out of control. If I had kept all of it to this point, I'd have 8 batches of seed culture to deal with.

And it only gets worse. Today I once again discarded half and added 16oz flour and 16oz water to turn the seed culture into 6 cups barm. If I had kept all 8 seed cultures, I would now have 16 barms, 96 cups worth. That's a lot of barm, considering the sourdough bread recipe only calls for 2/3 cup for 2 loaves. Even after one batch of bread, I still have to use up 4+ cups of barm in three days or I have to throw some away. After three days, the barm must be "refreshed," meaning I have to at least double the volume every 3 days by adding equal parts flour and water. Typically, you use or discard all but 1 cup by day 3, then refresh it back up to 6 cups. I guess I will be baking a lot this week to use up that precious barm. Or if any of my Zurich readers want some of my barm, leave a comment and we'll arrange a hand-off.

Thursday, December 06, 2007

TGSE: Day Four

My dough was supposed to double, but it's didn't grow one milimeter. So I'm pretty sure I've had the same problem detailed on Peter Reinhart's blog. Basically, the dough rises like crazy on day two, then goes completely dorment. Yep, that's me. Remedy: stir it every few hours till it wakes up again. We'll see. So I'm stuck on day four until it wakes up.

Wednesday, December 05, 2007

homemade italian sausage


breakfast casserole with homemade sausage
I tried to make it look appetizing but I'm not so sure
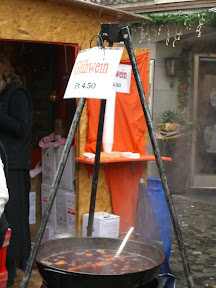
Switzerland is the land of sausage but not the "italian sausage" that we americans are so used to using. Back in the US, I used "italian sausage" meat instead of ground beef all the time to make quick and easy pasta sauces. But here, it's not readily available. I've decided that american "italian" sausage is not italian at all. I asked for it at a couple Italian butcher/delis in Zurich and they were totally confused by my request. I searched for months with no results and finally found something labeled "italianisch wurst" at a booth at the Wednesday speciality food market in the Zurich Hauptbahnhof. I don't remember the name of the booth, but it sold handmade pasta and italian deli meats like pancetta. I was skeptical, but it turned out to indeed be "italian sausage" and made for a very nice pasta sauce.

Then, my friend Cyndy mentioned that she makes her own sausage. She has the Globus Bellevue butcher grind up the pork shoulder and pancetta (2-1 ratio) and then adds her own spices at home. She doesn't bother to case it, just uses what she needs immediately and forms the rest into patties and freezes them for later. Great idea! So I got the recipe and finally tried it this week. It is fantastic and plus, I know exactly what is in there since I watched him grind the meat, with no extra junk. I got it at Globus Bahnhofstrasse and they ground it while I watched, no pre-order necessary. They were confused at first at my request given in broken German (I said something like "macht das gleich als hackfleisch, mit die gleich machine, alle zusammen, gemischt" which loosely translates "make it equal to ground meat, with the same machine, all together, mixed up"), but they were happy to help.

I made a breakfast casserole that Cyndy suggested (original and version I was given - I cut the bread into pieces instead of just slices and cooked for about 50mins instead of 30). It was quite good (I was skeptical), but once we tasted the sausage we desperately wanted to eat it on pizza. So that will be our next meal with this yummy stuff. Even if you're not in the culinary wasteland of Zurich, I still recommend making some homemade sausage meat just for fun. It's a real treat!

Here's Cyndy's sausage recipe. I used 400g pork shoulder and 200g pancetta (cost=20sfr) and decreased the other ingredients accordingly.

2 pounds fresh, ground pork shoulder, run through the largest hole of the butcher’s grinder
1 pound pancetta, run through the same grinder
1 tablespoon kosher salt
2 tablespoons fennel seeds
1.5 teaspoons fresh ground pepper
1 teaspoon oregano
1 tablespoon fresh basil leaves, chopped
1 tablespoon fresh parsley, chopped

Place pork shoulder and pancetta in a large mixing bowl. Mix with your hands just until well blended. Add the salt, fennel, pepper, oregano, basil and parsley and mix just until well blended. Work quickly as the warmth of your hands changes the texture of the sausage.

She recommends using the sausage with pasta sauce, lasagna, pizza, stuffed peppers, meatballs, soup, breakfast casserole, etc. Thanks Cyndy!

TGSE: Day Three

Around 3am last night, I got up to feed my crying baby and happened to peek in on my seed culture. It had risen all the way to the top of my 1 quart container and was pushing the lid off - AAAH! So I quickly transferred it into a bigger container, before attending to my baby. I was too sleepy to take a picture, so you'll just have to believe me. Today, I threw out half (as directed) and mixed in 4.5oz flour and 4oz water. Same tomorrow then hopefully onto the "barm" stage.


before discarding half and mixing in day 3 ingredients


after discarding half and adding day 3 ingredients


safe and sound in its new 50% bigger home

Tuesday, December 04, 2007

rolling sticks


exactly 5mm - I love being precise

My new favorite low-tech gadget is these rolling pin sticks that ensure your dough is rolled evenly to a specific thickness. They come in various sizes like 1/8 in, 1/4in, 1/2in, etc. You place them on either side of the dough and roll your rolling pin over them and the dough. No more uneven dough, no more guessing how tall the dough is. These are called Teighölzer in Zurich and I got them at Manor (although I heard they are available at Migros, etc.). You can also use rolling pin rings, basically rubber bands of various thicknesses that slide on the end of your rolling pin.

Also, if you aren't rolling your dough between parchment paper, start today. No more dough sticking to the counter and no more extra counter flour in your dough. Just roll your super sticky dough between the parchment, stick it in the fridge or freezer for awhile. When firm, take it out to cut or manipulate as needed. If your dough has lots of butter - act fast. My sugar cookies and gingerbread dough go from ice cold to practically liquid in under five minutes.


rolling pin sticks also double as a great toy

TGSE: Day Two

As expected, not much is happening yet. After 24 hours, it had not risen at all:


I added 4.5 oz flour and 4 oz water:


but 7 hours later it's already risen quite a bit.


The recipe calls for high-gluten or bread flour. Since I don't have access to that, I'm using Halbweissmehl at 13g protein, which is about the same as bread flour. I know that "Halbweissmehl" means half-white flour, but besides that I don't know what it is. The ingredients just show wheat, so who knows?

What else? I did get a very friendly response (shown below) from Peter Reinhart, author of The Bread Baker's Apprentice, to my inquiry about the texture of the day 1 seed culture. It's silly to say, but it gave me all sorts of warm fuzzies to get such a prompt and personal response from the author (or a representative signing his name?) of a cookbook I use so frequently. I'm encouraged and inspired for the rest of this experiment. I'm also toning down my previous comments about this cookbook - today was a good day, I can pass that along.

-------------------------

Hi Tanya,
I think there was a typo there, but the good news is that it doesn't matter--it will work either way, whether wet or firm. During the next feeding back down on the water to make a dough that's firmer, like baguette dough, and you'll be right where you need to be (and even if it's wet, it will still work--we've made starter using both wet sponges and firm doughs). The other thing to be concerned about is a tendency for the seed dough to come alive and then to go dormant for a few days. If this happens, stir or knead it twice a day and just wait a few extra days for it to come back to life and then resume feeding it as directed. There's a long explanation for this on my blog (in the archives) and also in the my new book on whole grain breads. Regardless, the key is that it will work no matter if you are patient with it. In a few days you should have a viable starter.
Stay in touch and let me know it goes.
Sincerely,
Peter

Monday, December 03, 2007

The Great Sourdough Experiment: Day 1


optimistic on day one -
holding my soon-to-be seed culture

The Great Sourdough Experiment (aka TGSE) was inspired by a comment by Jess, one of my readers, who asked if I had any experience making sourdough. I don't, but I should. This is no small task. It will take a minimum of seven days to make all the elements: seed culture, then barm, then sourdough starter, then bread. The main task is to capture wild yeast from the air and foster special bacterial activitiy in your dough starter over several days, then use this tasty goo to make your bread taste really good.


my not-so-short-hand schedule on the left, recipe on the right

I'm going to blog daily during this experiment. I'm already discouraged because my results do not match the Day One recipe instructions in The Bread Baker's Apprentice. I'm supposed to mix 1 cup flour with 3/4 water into a stiff ball of dough. I don't know how this is possible. Mine is merely a thick paste. It seems that some of the BBA recipes have typos or are poorly tested. The background info is always good, but occasionally I run across something in the actual recipe that seem quite incorrect. I checked Mr. Reinhart's other book Crust and Crumb to see if the flour/water ratio is similar and it was, but it described the dough as a smooth sponge??? I checked other sourdough starter recipes on the web and many used a similar ratio. With so much water, how could it possibly be stiff. I'm going to continue despite this and hope for the best. I did find this correction for the BBA sourdough starter that might be helpful. I've also sent an email to the recipe testers to see if I'm crazy. I wonder if they'll respond.


fresh ground rye flour - I feel so special

Another other fun thing happened on day one. I'm supposed to start with rye flour, but the health food store I went to (Vital Punkt) only had whole rye grain. But no problem; they simply ground up the grain for me. So cool and so fresh! I might start doing this with other grains. I've also heard that some people use coffee grinders to grind small quantities of grain. Hmm.

Sunday, December 02, 2007

gingerbread


cute, but not too cute to eat

Gingerbread cookies are just so darn cute, even with my terrible sloppy decorating, that I had to post some pics. I tried two recipes. The Cook's Illustrated one, pictured here, is excellent. Gingerbread is nortorious for being impossible to cut because the dough is so sticky. So apparently lots of recipes cut way back on the butter to make gingerbread easier to cut. But this results in tough, dry cookies. The Cook's version is easy to work with yet still tasty and pliant. Plus, they remain flat and keep the cookie cutter shape exactly, great if you are a precise decorator.

I also tried a recipe from Fine Cooking magazine, which has lots more butter and an egg, which makes the cookie more cakey and fluffy. I really like eating this one, especially if I underbake it (the recipe says 12-14 mins and I only cook it 8min). It's not doughy at all, just soft and chewy instead of dry and crispy.


I got a new set of Christmas cutters from Manor


Cook's cookies maintain their exact shape after baking


my son and I go to town with the royal icing


Gingerbread Cookies - flat and precise
See Cook's Illustrated

Gingerbread Cookies - plump and cakey
Adapted from Fine Cooking

10.5 oz all-purpose flour
1 tsp baking soda
1/2 tsp salt
2 tsp ground ginger
1 tsp ground cinnamon
1/2 tsp ground cloves
4 ounces unsalted butter
1/2 cup packed dark brown sugar
1/2 cup molasses
1 large egg

In a medium bowl, combine flour, baking soda, salt, ginger, cinnamon, and cloves. With an electric mixer, beat the butter and brown sugar until light and fluffy. Beat in the molasses and egg, scraping down sides as necessary. Beat in the flour until just combined. Remove the dough from the bowl, divide in half. Roll each half between parchment to 1/4 inch thickness. Chill until very firm, at least 3 hours.

Heat oven to 325F (160C). Remove parchment and cut cookies quickly and place on cookies sheets (lined with parchment) spaced 1 inch apart. Reroll scraps and chill again to make more cookies. Bake until finger leaves slight impression on top of cookie, about 8-10 mins (original recipe says 12-14mins, but 8 is perfect in my oven).

Royal Icing
1 pound powdered sugar
3 large egg whites
1/2 tsp cream of tartar

Combine all ingredients in a large bowl and mix on low speed until blended. Increase speed to medium and beat until the icing holds thick, soft peaks, 4 to 6 minutes. Don't overbeat or icing will stiffen and lose its gloss. If the icing is too thick, add a few drops of water. If too thin, add more powdered sugar, a tablespoon at a time. Keep icing covered when not in use. Will keep refrigerated in an airtight container for a week.

Saturday, December 01, 2007

cran-apple butter


my apple palate: applesauce,
apple butter and cran-apple butter

With a new baby, I didn't think I had the time or energy to make apple butter this year. I started to make a small batch in September, but never got around to canning it. I ended up just throwing it out after two weeks in the fridge. So sad. But luckily my Swiss friend, Irene, liked mine so much last year that she got the recipe from me and made some last month. She gave us a pint and we polished it off in under a week. That settled it: I had to make apple butter asap.


8.5 kilos cooking down

I picked up about 8.5 kilos (19lbs) of Elstar and Boskop apples at the farmer's market (they thought I was crazy). This filled my huge stockpot to the brim (as shown above). After a little cooking, I processed the apples through a food mill by hand to make applesauce (next year, I'm definitely getting the KitchenAid food mill attachment!). I saved a quart of this for eating and plopped the rest into my 7 quart dutch oven, filled to the brim again. I added sugar and spices then cooked it to about half its volume over the next 12 hours or so. I ended up with 16 cups of apple butter, which I promptly canned.


16 cups of yum

I also did a cranberry variation this year. I made a batch of my Thanksgiving cranberry sauce, strained it, then processed it through the food mill. I mixed this with equal volume apple butter to generate 6 cups of cran-apple butter. On the strength of this experiment, I think I'll try some other multi-fruit combos next year, like raspberry or apricot. Now I just need to make some bread to eat with it.
I used these instructions for making the apple butter. Here's my cranberry sauce recipe:
12 oz cranberries
1 cup sugar
1 orange, zest and juiced
1 large pear, chopped
1 large apple, chopped
½ tsp cinnamon
¼ tsp ground cloves
pinch of nutmeg

In medium saucepan, place cranberries, sugar, and 1 cup water. Bring to a boil, then lower heat and simmer for 5 minutes or until berries begin to pop. Add orange zest and juice, pear, apple, cinnamon, cloves, and nutmeg. Simmer 15 minutes. Remove from heat and cool to room temperature. You can make a couple days ahead of time, store in fridge until ready to use.
Related Posts Plugin for WordPress, Blogger...