Showing posts with label bread. Show all posts

Wednesday, December 12, 2007

TGSE: Day Nine

I'm starting to think this will never end and you and I both will be bored to tears come day 10.


my flat sourdough

That said, I made the basic sourdough and pumpernickel today. The sourdough tasted quite good, particularly as toast, but was quite flat. I don't know why. It rose fine but didn't pop in the oven like most breads. Perhaps the flour? I didn't use any vital wheat gluten. It also had a tight crumb, which I don't know if it should have or not.


my plump pumpernickel

The pumpernickel on the other hand, started out as sad, tiny lumps (I planned to put them into sandwich loaf pans as suggested in the recipe, but they were way too small) but plumped up beautifully during proofing and again the oven. I haven't tasted it yet as it is past midnight they still need to cool. So we'll see. The crust is really soft - is that right? I wish I could have a real perfect example of the bread instead of just a picture and description when I bake.

I shaped another miche tonight and will bake tomorrow. The first time I was lazy and used Ruchmehl instead of sifted organic whole wheat. This time I had organic whole wheat grain ground fresh for me. Then I sifted out some of the bran, as instructed by the recipe. I also halved the recipe so my KitchenAid could knead it. The texture is completely different, which is encouraging. I'm very curious to see how it tastes in comparison to the first loaf.

Must sleep...


sourdough after scoring


sourdough out of oven


moist, but tight crumb


buttery sourdough toast - yum

Monday, December 10, 2007

TGSE: Day Eight


I finally made the bread of the cover

I remembered why I don't make sourdough bread. Because I don't like sourdough bread. The bread was good and very pretty, but not what I crave. So after all that effort, it wasn't very satisfying. I'm still going to make the other breads this week, just to complete the project. We'll see if I like the others better. I'm tired and going to bed.


the gigantic dough proofing in my banneton


scored with my lame


this monster weighed in at 4 pounds

Sunday, December 09, 2007

TGSE: Day Seven

Oh, the suspense! I did not bake my bread today. Since I was having fondue tonight and wouldn't be eating this bread, I opted to retard the shaped bread in the fridge tonight and bake it tomorrow.

What did I do? Well, I added a ridiculous 32oz of flour to the firm starter and had to knead it by hand, since it was way too big for any non-commercial mixer. I'm not one of those "love to knead" people, especially with this unwieldy mass. I thought I was going to sprain my wrist. I gave up after 20 minutes, though it still wasn't really passing the windowpane test, and threw it in this 6qt container for a 4 hour rise.


after a 4hr rise, double trouble

Then I shaped it into a boule (or ball) and plopped it seam-side up in my banneton (proofing basket), which I haven't used in probably 3 years. Then into the fridge (I hardly had space considering my barm is taking up quite a bit of real estate). Tomorrow I take it out for another 4 hour rise, then bake. I can see the light at the end of the tunnel. I also made a firm starter for sourdough bread that I'll mix together tomorrow and bake on Tuesday.

I hope this basket can hold double this dough

Saturday, December 08, 2007

TGSE: Day Six


I'm in way over my head. I started to read The Bread Bible's sourdough chapter and I'm overwhelmed. It's so much more complicated than I thought and I'm afraid the sourdough culture is going to start dominating my life. My life is already dominated by one baby, I don't need another. Plus, my fridge is too small to keep so much of this stuff around. I should really just throw away the whole thing and forget all about wild yeast.

Anyway... My barm has refrigerated overnight and is looking very healthy. I scooped out 1 cup to add to my bread starter. I decided to make a Poilâne-style Miche first, sourdough tomorrow, and pumpernickel on the third active day of the barm (all recipes from Bread Baker's Apprentice). After that, I'm going to probably just refrigerate it until after the holidays, then decide what to do with it.

Tomorrow, I will actually mix, shape, and bake the first bread. I'm excited!

Friday, December 07, 2007

TGSE: Day Five


It's alive!!! When I woke this morning, the seed culture was again busting out of the container. Yay! I just stirred it couple times yesterday, as instructed by Mr. Reinhart's recipe "correction," which adds oxygen to help the yeast along. So I was able to proceed with the barm today after all. It's sitting in the fridge overnight and tomorrow I can make the firm sourdough starter. The end is near.

In answer to Margaret's comment about throwing half away - yes, it feels like a big waste. It took 4 cups of flour to yield one cup of seed culture. Instead of throwing away half, I could have put it in a separate container and maintain both. But since you have to divide the seed culture every day and the barm every three days, it starts multiplying out of control. If I had kept all of it to this point, I'd have 8 batches of seed culture to deal with.

And it only gets worse. Today I once again discarded half and added 16oz flour and 16oz water to turn the seed culture into 6 cups barm. If I had kept all 8 seed cultures, I would now have 16 barms, 96 cups worth. That's a lot of barm, considering the sourdough bread recipe only calls for 2/3 cup for 2 loaves. Even after one batch of bread, I still have to use up 4+ cups of barm in three days or I have to throw some away. After three days, the barm must be "refreshed," meaning I have to at least double the volume every 3 days by adding equal parts flour and water. Typically, you use or discard all but 1 cup by day 3, then refresh it back up to 6 cups. I guess I will be baking a lot this week to use up that precious barm. Or if any of my Zurich readers want some of my barm, leave a comment and we'll arrange a hand-off.

Wednesday, December 05, 2007

TGSE: Day Three

Around 3am last night, I got up to feed my crying baby and happened to peek in on my seed culture. It had risen all the way to the top of my 1 quart container and was pushing the lid off - AAAH! So I quickly transferred it into a bigger container, before attending to my baby. I was too sleepy to take a picture, so you'll just have to believe me. Today, I threw out half (as directed) and mixed in 4.5oz flour and 4oz water. Same tomorrow then hopefully onto the "barm" stage.


before discarding half and mixing in day 3 ingredients


after discarding half and adding day 3 ingredients


safe and sound in its new 50% bigger home

Tuesday, December 04, 2007

TGSE: Day Two

As expected, not much is happening yet. After 24 hours, it had not risen at all:


I added 4.5 oz flour and 4 oz water:


but 7 hours later it's already risen quite a bit.


The recipe calls for high-gluten or bread flour. Since I don't have access to that, I'm using Halbweissmehl at 13g protein, which is about the same as bread flour. I know that "Halbweissmehl" means half-white flour, but besides that I don't know what it is. The ingredients just show wheat, so who knows?

What else? I did get a very friendly response (shown below) from Peter Reinhart, author of The Bread Baker's Apprentice, to my inquiry about the texture of the day 1 seed culture. It's silly to say, but it gave me all sorts of warm fuzzies to get such a prompt and personal response from the author (or a representative signing his name?) of a cookbook I use so frequently. I'm encouraged and inspired for the rest of this experiment. I'm also toning down my previous comments about this cookbook - today was a good day, I can pass that along.

-------------------------

Hi Tanya,
I think there was a typo there, but the good news is that it doesn't matter--it will work either way, whether wet or firm. During the next feeding back down on the water to make a dough that's firmer, like baguette dough, and you'll be right where you need to be (and even if it's wet, it will still work--we've made starter using both wet sponges and firm doughs). The other thing to be concerned about is a tendency for the seed dough to come alive and then to go dormant for a few days. If this happens, stir or knead it twice a day and just wait a few extra days for it to come back to life and then resume feeding it as directed. There's a long explanation for this on my blog (in the archives) and also in the my new book on whole grain breads. Regardless, the key is that it will work no matter if you are patient with it. In a few days you should have a viable starter.
Stay in touch and let me know it goes.
Sincerely,
Peter

Monday, December 03, 2007

The Great Sourdough Experiment: Day 1


optimistic on day one -
holding my soon-to-be seed culture

The Great Sourdough Experiment (aka TGSE) was inspired by a comment by Jess, one of my readers, who asked if I had any experience making sourdough. I don't, but I should. This is no small task. It will take a minimum of seven days to make all the elements: seed culture, then barm, then sourdough starter, then bread. The main task is to capture wild yeast from the air and foster special bacterial activitiy in your dough starter over several days, then use this tasty goo to make your bread taste really good.


my not-so-short-hand schedule on the left, recipe on the right

I'm going to blog daily during this experiment. I'm already discouraged because my results do not match the Day One recipe instructions in The Bread Baker's Apprentice. I'm supposed to mix 1 cup flour with 3/4 water into a stiff ball of dough. I don't know how this is possible. Mine is merely a thick paste. It seems that some of the BBA recipes have typos or are poorly tested. The background info is always good, but occasionally I run across something in the actual recipe that seem quite incorrect. I checked Mr. Reinhart's other book Crust and Crumb to see if the flour/water ratio is similar and it was, but it described the dough as a smooth sponge??? I checked other sourdough starter recipes on the web and many used a similar ratio. With so much water, how could it possibly be stiff. I'm going to continue despite this and hope for the best. I did find this correction for the BBA sourdough starter that might be helpful. I've also sent an email to the recipe testers to see if I'm crazy. I wonder if they'll respond.


fresh ground rye flour - I feel so special

Another other fun thing happened on day one. I'm supposed to start with rye flour, but the health food store I went to (Vital Punkt) only had whole rye grain. But no problem; they simply ground up the grain for me. So cool and so fresh! I might start doing this with other grains. I've also heard that some people use coffee grinders to grind small quantities of grain. Hmm.

Wednesday, November 28, 2007

roll it


my bread basket makes its once-a-year appearance

We celebrated this Thanksgiving with 50 or so other Americans, buffet style. I was assigned rolls, stuffing and cranberry sauce. I started testing out rolls the week before, different recipes, different shapes. My freezer now has a nice collection that I can break out for emergencies. My favorite was the Cook's Illustrated Best American Dinner Rolls, which were so fluffy and delicious, I wanted to eat them all in one sitting. I also like that the shaped rolls must be refrigerated 24 to 48 hrs, so I don't have to make the dough and shape them on turkey day.


I first baked in 9inch cake pan as suggested
yum, but not pretty when separated


I preferred this mini-loaf shaping


Bread Bible dinner rolls - not sweet enough

These Bread Bible rolls were ok, but not sweet enough and not as flaky as the winner. I did not like the cloverleaf shaping at all. Too much crust, not enough fluffy interior. The most interesting thing was the coloring. I used the "ice in hot pan" steaming method with the ones on the left, but not the ones on the right. Now I'm convinced it makes a difference and will discpline myself to use that method more often to get a golden crust.


another Cooks' recipe - Best Dinner Rolls Made Easy
ok, but not sweet enough

Best American Dinner Rolls - the winner
adapted from Cook's Illustrated
3/4 cup milk
6 TB unsalted butter, melted (plus 2 TB for brushing on rolls before baking)
6 TB sugar
1 1/2 tsp table salt
2 large eggs, room temperature
1 package rapid-rise yeast
3 cups unbleached all-purpose flour (15 ounces)

1. Make dough: Bring milk to boil in small saucepan over medium heat; let stand off heat until skin forms on surface, 3 to 5 minutes. Using soup spoon, skim skin off surface and discard. (Why scald milk?) Transfer milk to bowl of standing mixer and add 6 tablespoons melted butter, sugar, and salt; whisk to combine and let mixture cool. When mixture is just warm to the touch (90 to 100 degrees), whisk in eggs and yeast until combined.

2. Add flour to bowl; using dough hook, mix on low speed on standing mixer until combined, 1 to 2 minutes. Increase speed to medium-low and knead about 3 minutes more; when pressed with finger, dough should feel tacky and moist but should not stick to finger. (If dough is sticky, add another 1 to 3 tablespoons flour.) Continue to knead on medium-low until cohesive, elastic dough has formed (it should clear sides of bowl but stick to bottom), 4 to 5 minutes longer.

3. Transfer dough to lightly floured work surface. Knead dough by hand 1 to 2 minutes to ensure that it is well kneaded. Dough should be very soft and moist but not overly sticky. (If dough sticks excessively to hands and work surface, knead in flour a tablespoon at a time until dough is workable.) Lightly spray medium bowl with nonstick cooking spray. Transfer dough to bowl; lightly coat surface of dough with cooking spray and cover with plastic wrap. Let dough rise in warm, draft-free location until doubled in volume, 2 to 3 hours.

4. Shape rolls: (The original recipe below puts rolls in two 9-inch cake pans, which I did not like because the rolls aren't uniform or pretty when you take them out. I prefer lining them up in a square or rectangular baking dish. To do this, prepare the rolls the same as described below but place in the square/rectangle pan, about four across with sides touching and leaving a little space between rows, as shown in this article.)

Coat two 9-inch round cake pans with cooking spray; set aside. Pat dough into rough 12 by 10-inch rectangle, gently pressing out air; starting from edge farthest from you, roll dough into cylinder. Using palms, roll dough back and forth until cylinder is about 18 inches long and of even thickness. Using bench scraper or chef's knife, cut into 16 evenly sized pieces (or more if you want smaller rolls).

5. Working with one piece at a time and keeping remaining pieces covered with plastic wrap or kitchen towel, form dough pieces into smooth, taut rounds. Set piece of dough on unfloured area of work surface. Loosely cup hand around dough (not directly over it); without applying pressure to dough, move hand in small circular motions. (Tackiness of dough against work surface and circular motion should work dough into smooth, even ball.) Arrange shaped rolls in prepared pans; cover pans with plastic wrap lightly coated with cooking spray, then cover pans securely with foil. Refrigerate at least 24 or up to 48 hours.

6. Bake rolls: Remove foil (but not plastic wrap) from cake pans; let rolls rise in draft-free cool room-temperature location until doubled in volume (rolls should press against each other), 6 to 7 hours. When rolls are nearly doubled in volume, adjust oven rack to lower-middle position and heat oven to 400F (205C). Remove plastic wrap. Brush rolls with 2 tablespoons melted butter; bake until deep golden brown, 14 to 18 minutes. Cool rolls in pans on wire rack about 3 minutes, then invert onto rack; re-invert rolls and cool 10 to 15 minutes longer. Break rolls apart and serve warm.

Saturday, November 10, 2007

sloppy makes perfect - Pain à l'Ancienne baguettes


today's lunch - Pain à l'Ancienne with Roquefort

Fresh off my ciabatta victory, I attempted Pain à l'Ancienne baguettes from The Bread Baker's Apprentice (aka BBA). I'm glad to report I had another scrumptious success. The crust was gorgeous, crisp. The flavor was slightly sweet. The crumb was holey, silky, and just chewy enough. It reminded me of our Paris trip this year, when we got bread from La Grande Épicerie and other fab bakeries in the neighborhood and would simply eat bread with butter and jam for breakfast. Heaven. If only it didn't take a whole day to make bread like this.

to some, this may just be some sloppy dough
but to me, it's a thing of beauty

Apparently "pain à l'ancienne" refers not to a type of bread, but rather a delayed-fermentation technique for making the dough. In this case, I shaped it into rustic baguettes (no rolling this dough), though it can be used for ciabatta, pugliese, foccacia, pizza (I'm very curious how that would turn out), etc. The recipe yields 6 baguettes (it's only good for one day, who can eat 6 in one day?) so I halved the recipe. Here are measurements I used:

- 13.5 oz bread flour (or in my case, Halbweissmehl at 13g protein plus 3 tsp vital wheat gluten)
- 1 1/8 tsp salt
- scant teaspoon of instant yeast
- 9.5 to 12 oz ice cold water (40F) - I used the whole 12 oz

You can find the instructions here (as well as many other places on the web).


after the overnight rise in fridge
followed by 6 hours on the counter


divided in thirds with pastry scraper


placed carefully on parchment paper


puffed up after only a couple minutes in 550F oven


crispy and golden, but my scoring is still terrible
must learn how to use my lamé

Friday, November 09, 2007

best bread I ever made


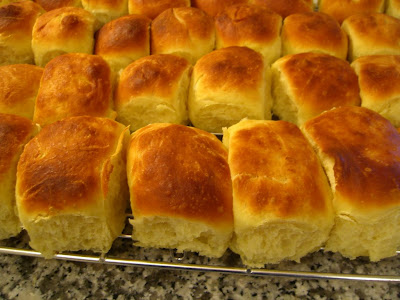
finally, a ciabatta I can be proud of

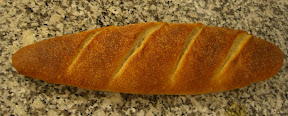
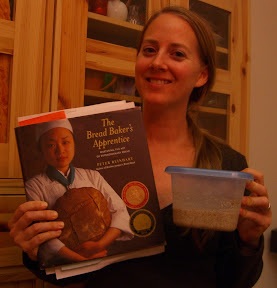
I'm so excited that I'm typing this post while eating my ciabatta, dripping olive oil all over the keyboard. It's so good. But more importantly, it hopefully signals a new wonderful phase in my bread-making: a phase where I can actually make artisan bread, not just try. I made ciabatta from 
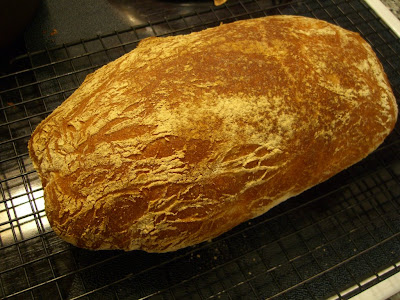
The Bread Bible (my new favorite bread book) and it was perfect. The crumb was impossibly light and chewy, the crust golden and crunchy. It's better than any ciabatta I've ever eaten, or at least that I can remember. And I'm absolutely shocked. I've made several attempts at these artisan breads before. Most have been tasty, even pretty, but not anything like what a proper artisan loaf should be. The crumb has been too tight, the crust too soft. My first and only ciabatta attempt last year was so sad, I didn't even eat it.


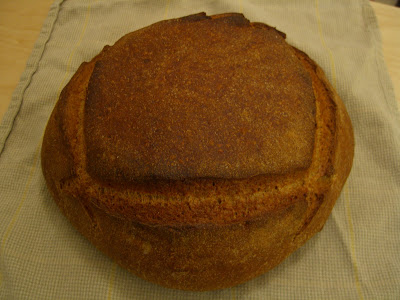
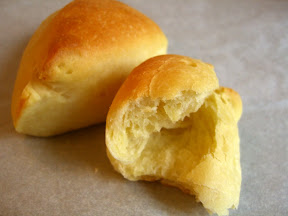
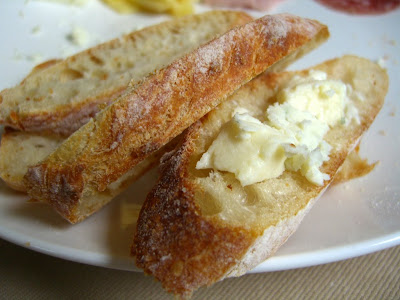
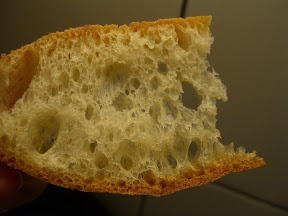
super holey and lacey crumb


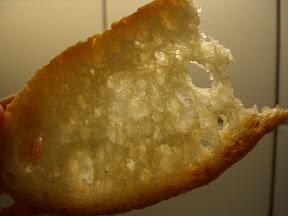
the money shot - see that light shining through

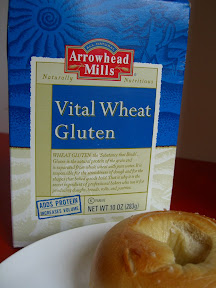
So what happened and will I be able to replicate it? First, I used the 
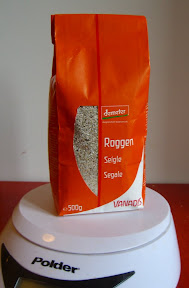
vital wheat gluten again (which ups the protein of any flour), which I'm convinced is the key to success. Of course, I'd have to try the recipe again without it to verify my theory. I'm going to bring back so many boxes of this stuff on my next trip to the US. Second, I'm starting to have a better sense of what various doughs should feel like, so I can more comfortably adjust the water/flour as necessary if the dough doesn't feel right. With this ciabatta, I added more water to make it more sticky (so the dough cleared the sides of the mixer bowl, but not the bottom, as instructed by the cook book) and I'm sure this made a difference as well. On the flip side, with my 
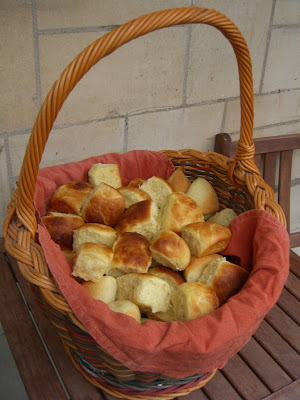
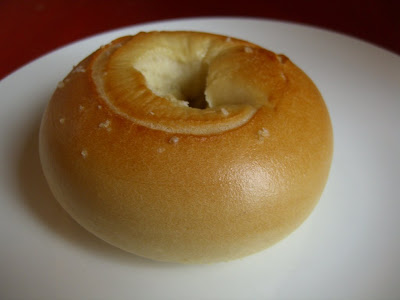
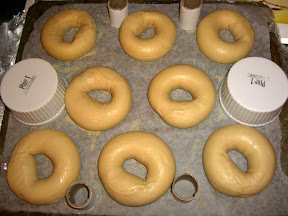
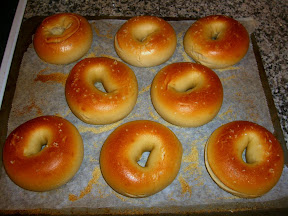
"perfect" bagel dough, I let it be super stiff (as instructed by the cook book), though it seemed so wrong. That paid off as well. Well, with this success, I'm inspired to make every other artisan loaf in the book: pugliese, bagettes, pain l'ancienne, etc. We'll see if I can make this trend.


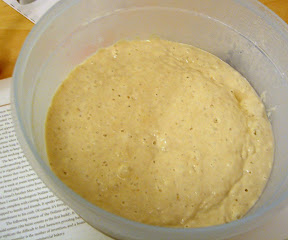
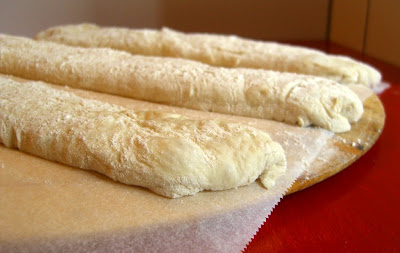
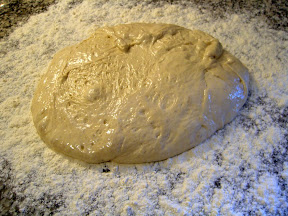
during shaping, the dough was light and delicate,
I was almost afraid to touch it


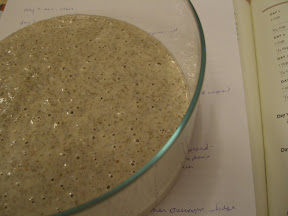
after shaping, covered with flour
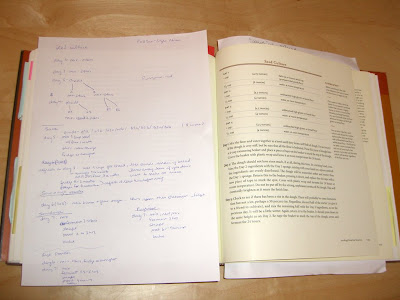
and full of decorative wrinkles

I'll post the recipe later when I'm done eating the bread (and get some sleep)....OK, here's the recipe, highly abbreviated. I leave out lots of basic bread making things like stir the yeast into the flour before adding the salt (yeast dies on direct contact with salt), etc. For all the detailed ins and outs of bread making, get the book - it's great.
Ciabatta, adapted from The Bread Bible
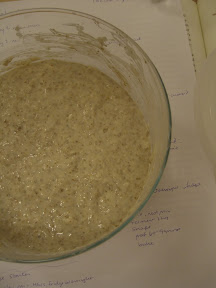
1. Six hours or up to 3 days ahead, make the biga. In a small bowl/storage container, combine and stir 3-5 mins until smooth:
2.6 oz (75g) unbleached all-purpose flour
1/16 tsp instant yeast
1/4 cup room temp water
Cover bowl tightly with plastic wrap or put lid on storage container and set aside until tripled and filled with bubbles, about 6 hours. Stir it down and use or refrigerate for up to 3 days (remove to room temp for 1hr before using).
2. Mix the dough. In mixer bowl, combine:
4.75 oz (136g) unbleached all-purpose flour
1/4 tsp instant yeast
1/2 tsp salt
1/2 cup water
biga, from above (a scant 1/2 cup)
Using paddle attachment (not dough hook), mix on low speed until all flour is moistened. Then beat at medium-high (#6 on KitchenAid) for 3 minutes, until strands of gluten start to develop. Lower speed to medium (#4) and beat for 2 more minutes. If dough hasn't pulled away from sides of bowl, beat at med-high speed again for a couple minutes. If it's still sticking, beat in a little flour 1 tsp at a time. Dough should be sticky.
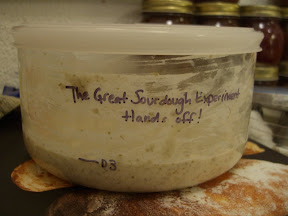
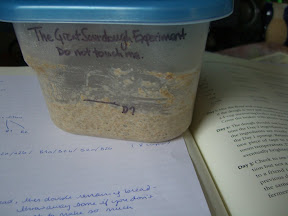
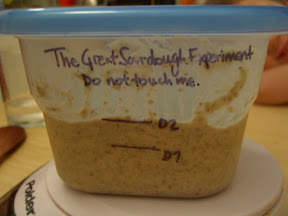
3. Let dough rise. Scrape dough into 1 quart/liter lightly oiled container, cover and let rise until tripled, 1.25 to 2 hours.
4. Shape dough and let rise. This is the most critical and most fun part of making ciabatta. Sift lots of flour onto counter, then gently scrape dough onto flour. Sift more flour on top of dough. Push together slightly into rectangle. Using your fingertips, make large, deep dimples in the dough about 1 inch apart, which elongates the dough. Push the sides of the dough together again (this creates the classic wrinkled lines in the crust.) Carefully lift and invert dough onto prepared baking sheet (covered with parchment). Push sides of dough together again. Dough should measure about 4.5in wide and 0.5-1in tall. Cover with large container or loosely with plastic wrap and let rise 1.5-2 hrs, until 1-1.5in tall.
5. Preheat oven to 475F (245C) 1 hr before baking. Use a baking stone if possible. I use an oven peel and slide parchment directly onto baking stone, rather than using a baking sheet. Also, put a baking sheet on oven floor or at lowest level; when you first put the bread in, throw some ice cubes in this pan to create some steam in the oven. This is optional - I rarely do it because my freezer is too small to always keep ice on hand. I did not do it this time.
6. Bake the bread. Bake for 5 mins then reduce oven temp to 450F (230C) and continue baking for 20 minutes or until bread is deeply golde brown and internal temp reads about 214F (100C). Then turn off oven, prop oven door open with a wooden spoon and allow bread to sit for 5 mins.
7. Cool the bread. Remove bread from oven and place on wire rack to cool completely.

Sunday, October 21, 2007

finally, bagel perfection


satiny smooth goodness flecked with fleur de sel

After many strange attempts, I finally made the perfect bagel. Of course, there's always room for improvement. But this bagel was everything I could ask from a bagel - plump, shiny, smooth, chewy, golden & delicious.


before rise ... plumper after 12hr rise in fridge


even plumper after boil ... golden & plump after 12min in oven

Earlier this week, I made the saddest bagels ever (see pic below) as a test run for a bake sale. My previous attempts had problems, but they were always plump and yummy. These were even lumpier, while also squat and dense: a winning combo. They didn't raise a lick during the 12hrs in the fridge. I used the Bread Baker's Apprentice recipe I've used before (which was ok, but far from perfect), but measured instead of weighed my flour. This set off a chain of events that I suspect led to the ultimate failure. This book suspiciously uses 4.5oz per cup while most other resources use 5oz per cup (which is also what my typical cup weighs). This discrepency always makes me second guess these recipes.

So this time I measured, as an experiment, potentially adding several more ounces of flour than intended by the recipe. My dough was so big and stiff, it was jumping out of my KitchenAid and I had to result to hand kneading. I was physically unable to add the final 3/4 cup flour and I couldn't knead nearly as long as I should have. The dough should be stiff, but it also must be kneaded good and long to develop the gluten despite that stiffness. So maybe with my poor kneading, the gluten didn't form properly, resulting in floppy, flat blobs. However, they were chewy and kinda tasty so I did eat three before throwing away the rest (I just couldn't stand looking at their sorry shapes anymore).


sad, lumpy, flat bagel wannabes

After this debacle, I almost gave up. But I had to redeem myself, so I tried the Cook's Illustrated recipe that I've been avoiding because it firmly states that you should not even attempt bagel making without high gluten flour (much higher protein than even bread flour), available only by special order. I live in Zurich and I can't even get bread flour (anything over 13g protein).


my new secret weapon

But my step-mom recently brought me a secret weapon - vital wheat gluten. You add 1 tsp per cup of flour to increase the gluten/protein level of any flour. I used 6 tsp to my 4 cups of flour and I think this made a huge difference. The dough was so elastic and strong, not just stiff. It was amazing! Shaping was a breeze; I rolled into a smooth rope and firmly fastened the ends into a circle, seemingly just as nature intended. And they baked into satiny smooth golden wonders, a dream come true.

Now that I've made the perfect bagel, I finally know what the dough should feel and look like - super stiff, super smooth, not one bit of sticky. With this knowledge, I'm confident I can try other bagel recipes (with sponges and other techniques to develop flavor) and adjust the flour properly (as all good bakers can) instead of strictly adhering to the recipe's measurements.

Gallery of losers:


attempt 1: lumpy, lop-sided and pale


attempt 2: lumpy (raisins don't help), swirl instead of circle

attempt 3: lumpy, no hole

Other things I learned:
- Shorter boil (30sec total) is better. The longer the boil, the thicker the crust, preventing it from plumping in oven.
- Rolled rope shaping is better than hole punching - ensures super smoothness
- You must create a big hole during shaping, at least 2.5in for normal sized bagel. Any smaller and it will completely disappear.

Unsolved mysteries:
- I'm still not sure what to add to the boiling water. I'm kinda sold on baking soda, though the Cook's recipe adds nothing and other swear by barley malt syrup.
- Must find barley malt syrup. All recipes include this in the dough for "traditional" flavor. I don't know where to get it in Zurich.
Related Posts Plugin for WordPress, Blogger...