Showing posts with label recipe. Show all posts

Saturday, February 17, 2007

fluffy stuff - sugar cookies

I've tried lots of sugar cookies recipes (even my trusted Cook's Illustrated) without finding what exactly I wanted. Most recipes deliver a thin, crispy cookie, that often taste too much like butter or flour instead of like a cookie. Of course, I had a model in my mind - a thick, soft, semi-sweet cookie made by my best friend's mother, Donna. I don't why it too me so long to ask for the recipe, but finally I have it and dream has become reality. They are perfect!
The first trick is rolling out the dough thicker, duh. About 1/4 inch instead of 1/8 inch. My best friend, Leslie, also gave me this advice: "I am a firm believer that the secret to any great homemade cookie is beating up the butter/sugar and eggs/liquids tons until light and fluffy before ever adding any dry ingredients." When I read this, it sounded like standard cookie technique. But based on the wonderful results this time, probably something I hadn't paid enough attention to in the past. Here's a pic of my fluffy stuff, pre-dry stuff:
Thick, Soft Sugar Cookies
makes about 30 cookies
12 TB butter (6oz)
1 cup sugar (7oz)
2 eggs
1 tsp. vanilla
2.5 cups all-purpose flour
1 tsp baking powder
1 tsp salt
  1. Beat butter and sugar until very light and fluffy. Add eggs and vanilla and beat 2 more minutes. Add dry ingredients and mix until incorporated.
  2. Chill dough for 1 hour. It’s easier to roll out the dough later if you first shape dough into two disks, about 4 inches in diameter, and then wrap each tightly in plastic wrap. (I don't know if this step is really necessary. Sometimes I immediately roll in parchment and chill from there. I think the chilling is just to make the dough more manageable.)
  3. Roll & cut. Roll dough thicker than you think you should, approx ¼ inch. The dough warms up very quickly; in about 5 minutes out of the fridge, the dough is a sloppy, buttery mess. So it’s best to roll the dough between parchment paper, then freeze or refrigerate until very cold, then cut very quickly. This technique also prevents the dough from spreading as much in the oven (if bake immediately after cutting), thus preserving more delicate shapes.
  4. Bake on ungreased sheet at 400F degrees (205C) for about 7 minutes. Remove just before they start to brown, but they no longer look dough-y. Allow to cool briefly on the pan, then transfer to a rack. Frost & decorate & enjoy!
Quick White Icing (from Joy of Cooking)
Makes about 1 cup. This is my standard icing for decorating with kids. For a more sophisticated glaze, just thin with milk until desired consistency. Heating the icing supposedly eliminates the raw flavor of the cornstarch in the pwd sugar, while making the icing more creamy and more intensely flavored. You be the judge.
Melt or heat in the top of a double boiler over low heat:
4 TB (2oz) unsalted butter or 3 TB heavy cream
Remove from heat and stir in:
2 cups powdered sugar, sifted if lumpy
3 TB milk
pinch of salt

Cook, stirring occasionally, over barely simmerig water for 5 minutes. Remove from the heat and add:
1 tsp vanilla
Beat until cool and the desired consistency. Keeps for up to 3 days at room temperature, 3 weeks refrigerated, or 6 months frozen.

Friday, October 13, 2006

apple butter


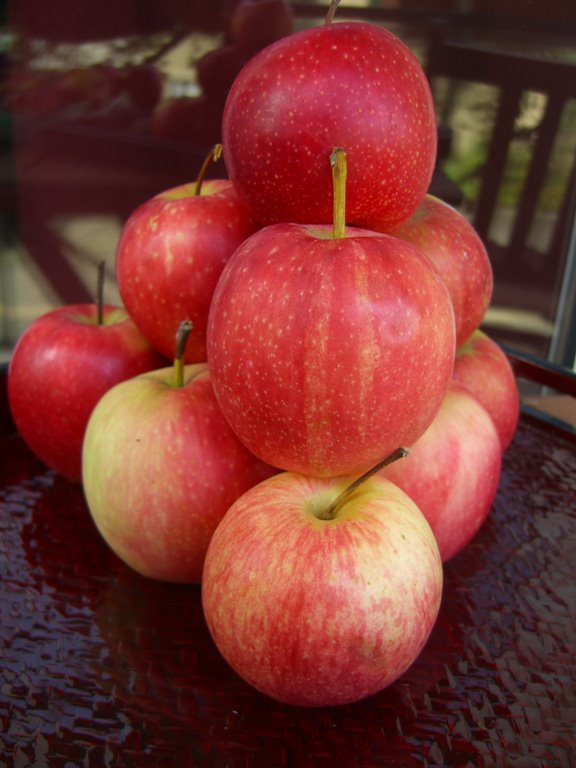
I learn many things in my German class. Last week I learned that, despite my protests, apples cannot be made into "confiture". Apfelmus, ja, Apfelconfiture, nein. Perhaps this because "apple butter" has not yet infiltrated this otherwise apple-saturated region. But to an American (or at least this American), apple butter is synonymous with autumn and must be consumed for this season to be properly celebrated. In case you were wondering, applesauce is cooked apples processed in a blender or a food mill, while apple butter takes this a step further adding spices and cooking the applesauce down into a thick, gooey spread. And unlike jam or preserves, you don't add pectin to fruit butter.

I tripped over boxes of Elstar apples at my corner grocery, priced at 5 kilos for 5CHF. I'd never heard of this apple variety before, but at the price, I could afford a gamble. What a find! This apple tasted like an apple.
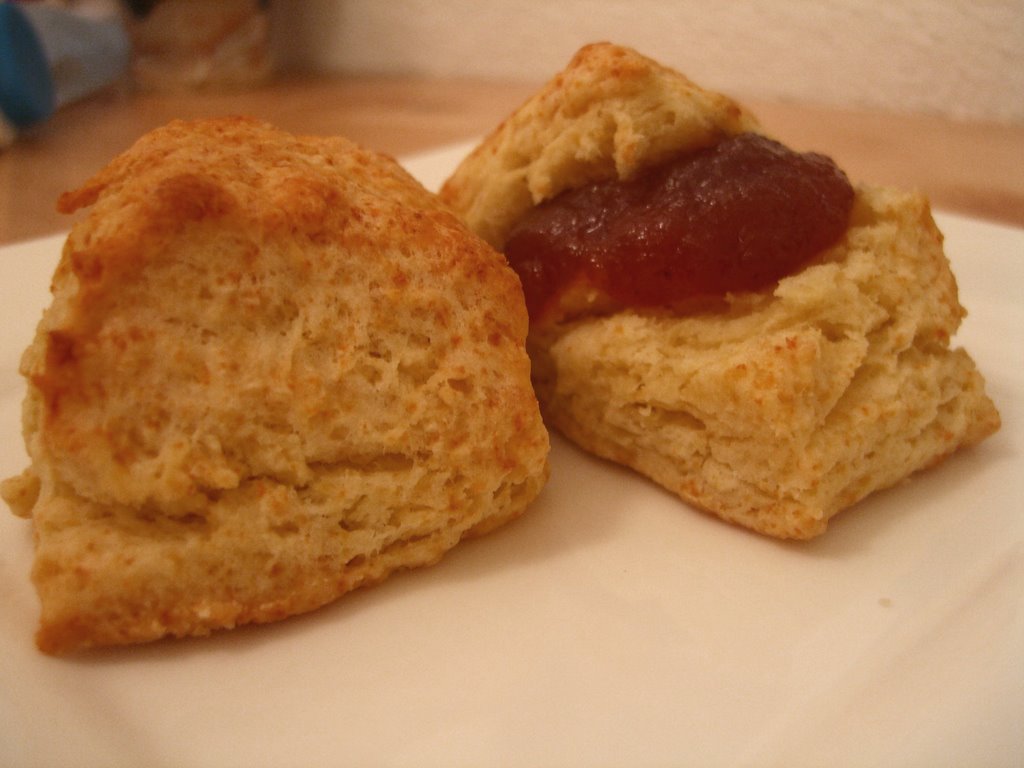
Seriously, just think about exactly what an apple should taste like and this apple tastes like that. It was almost surreal. Of course, the perfect eating apple doesn't always make the perfect baking apple (link to apple chart). But I was willing to try. Three days and 12+ hours of slow simmering later, my 5 kilos had shrunk into 1 quart of mouth watering goodness just waiting for me to bake some biscuits on which to eat it (recipe below). Now I'm inspired to make more fruit butters. I think I'll start with plum and pumpkin.

Most recipes are generally the same:

  1. peel and chop apples
  2. simmer with some cider until apples break down
  3. add sugar, lemon juice, and spices (cinnamon, cloves, allspice)
  4. simmer on lowest heat until desired consistency (6-12 hours)
  5. can it, processing for about 10 minutes

Here's one recipe I used as reference. My experience shows that specific proportions and time are not particularly important. This is definitely a recipe you can feel and taste your way through, even if you're not that type of cook (I am not that type of cook). However, there are some important things to note:

  • don't add too much liquid/cider. The more you add, the more you have to simmer that sauce to evaporate it out. Start with just a little liquid so the apples don't stick and add more at the beginning (first hour) if you feel the need. Again, most recipes call for much more than you really need
  • don't add too much sugar. Many recipes called for 2-1 apples to water ratio. I added half this much and wondered if I still had added too much.
  • just give in and buy that food mill - the plastic Mouliere model is inexpensive but solid. You'll be thanking yourself every time you have don't have to spend an hour shoving some stupid sauce or chili paste through a stupid sieve. Just do it!
  • experiment with the flavoring - I've seen recipes call for ginger, molasses, red hots. If you make a lot, separate it into different batches near the end and add different spices

P.S. I recently read that most apples we consume are over 6 months old, having been placed in man-made hibernation. Yuck. Check the story.
P.P.S. This site has a very comprehensive guide on apple varieties: http://www.applejournal.com/use.htm

Buttermilk Biscuits
Adapted from Cook's Illustrated. Makes 1 dozen

2 cups unbleached all-purpose flour
2 teaspoons baking powder
1/2 teaspoon baking soda
1 teaspoon granulated sugar
1/2 teaspoon table salt
8 tablespoons unsalted butter chilled, cut into 1/4-inch cubes
3/4 cup buttermilk plus 2 - 3 tablespoons additional, if needed

1. Set rack at middle position and heat the oven to 450°F (230C).

2. Mix or pulse first 6 ingredients in a large bowl or the workbowl of a food processor fitted with steel blade. With your fingertips, a pastry blender, 2 knives, or steel blade of the food processor, mix, cut, or process butter into the dry ingredients until mixture resembles coarse meal with a few slightly larger butter lumps.

3. If making by hand, stir in buttermilk with a rubber spatula or fork until mixture forms into soft, slightly sticky ball. If dough feels firm and dry bits are not gathering into a ball, sprinkle dough clumps with additional tablespoon of buttermilk. Be careful not to overmix. If using food processor, pulse until dough gathers into moist clumps. Remove from food processor bowl and form into rough ball.

4. With lightly floured hands, knead a couple times to make a cohesive mass (it will be sticky!). Then press into a square. Use a bench scraper (or knife) to divide dough into 12 equal portions. Place 1 inch apart on ungreased cookie sheet or pizza pan. Brush dough tops with melted butter or milk. (May be covered with plastic wrap and refrigerated for up to 2 hours.) Bake until biscuit tops are light brown, 10 to 12 minutes. Serve immediately.

Thursday, October 12, 2006

liquid gold


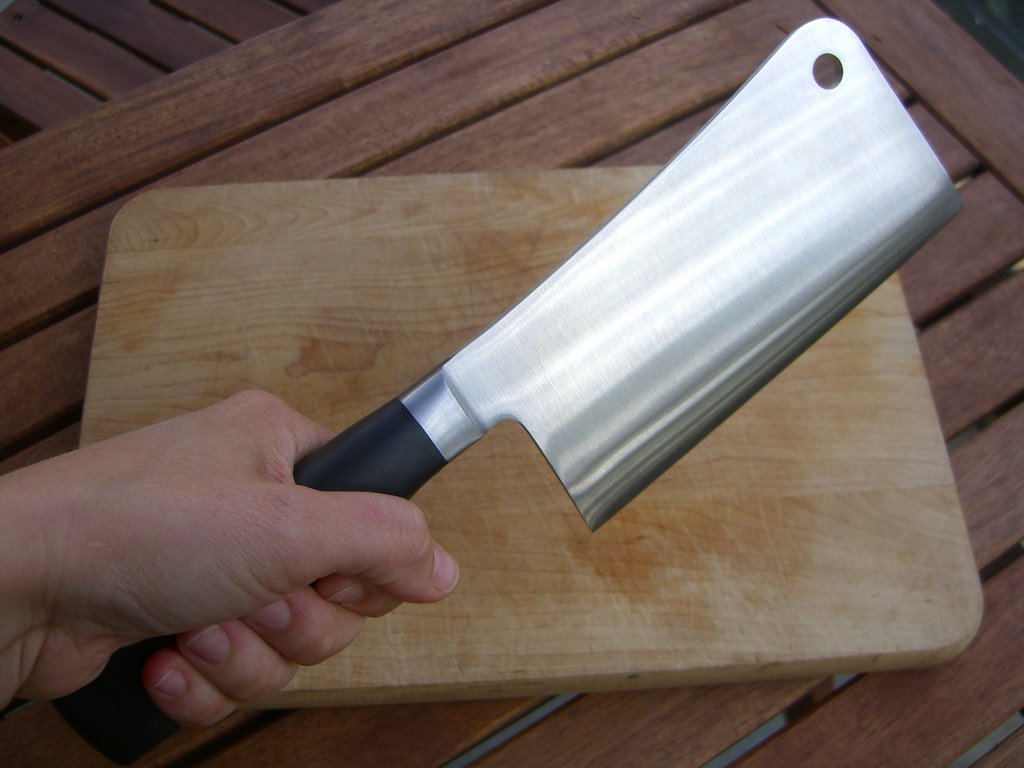
1 new shiny meat cleaver + 6 discarded chicken backs = liquid gold

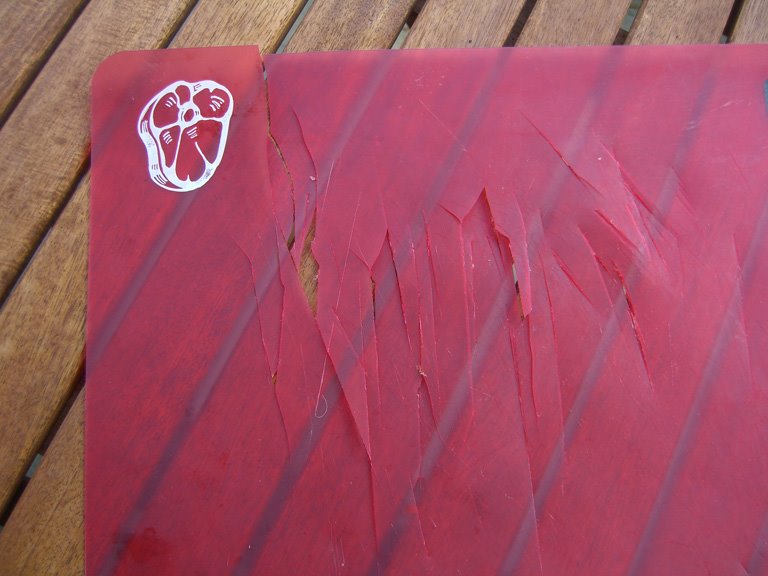
Why didn't anyone tell me how enjoyable it is to wield a meat cleaver? At first, I was timid and it took a few chops to make it through the bone. But then I moved my hand farther back on the handle and extended my swing and... BOOM goes the dynamite! I could chop all day. Unfortunately, my plastic cutting mat wasn't up to the challenge - see exhibit A.


exhibit A

I specifically bought the cleaver so I could make chicken stock. I'm as lazy as the next cook, so I usually use canned chicken broth. But it's not available in here, or at least I haven't found any yet. Apparently everyone here uses instant bouillon. I admit that canned chicken broth is not great, but bouillon? Perhaps I'm being a food snob, but isn't instant bouillon just chicken-flavored chemical-ridden salt dust? Perhaps you're asking the same questions I ask myself every time I make a soup, stew, or sauce:

  • Has canned chicken broth not yet crossed the Atlantic?
  • Or do people here simply prefer instant bouillon to stock?
  • Or do they not cook things that require stock?

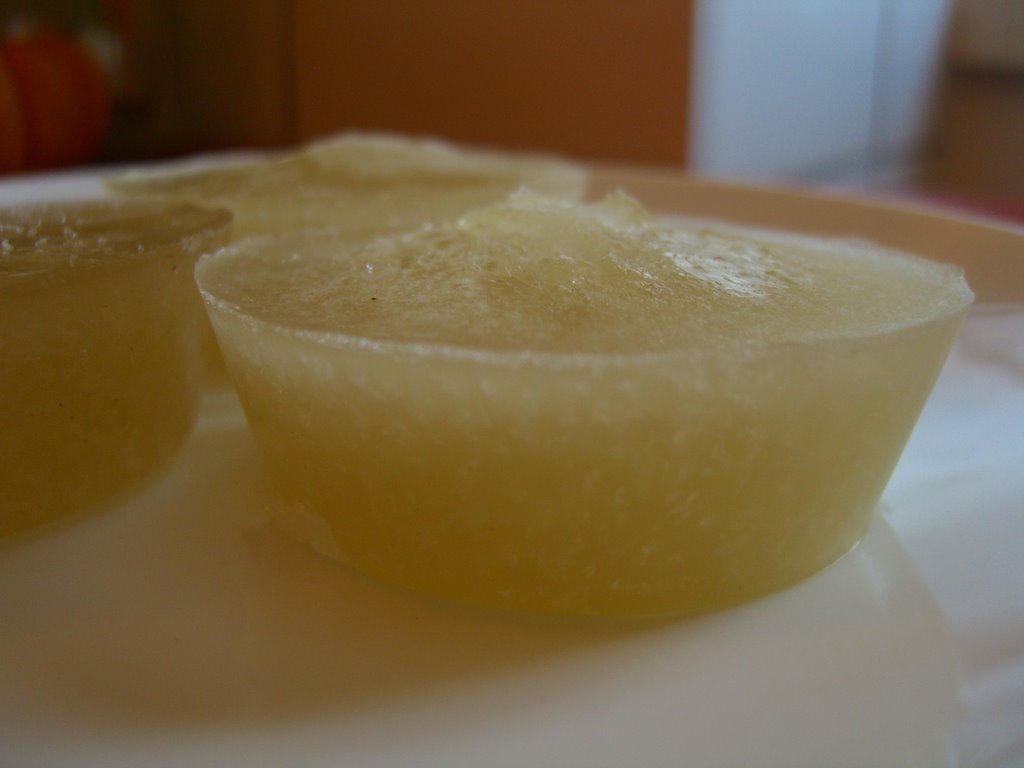
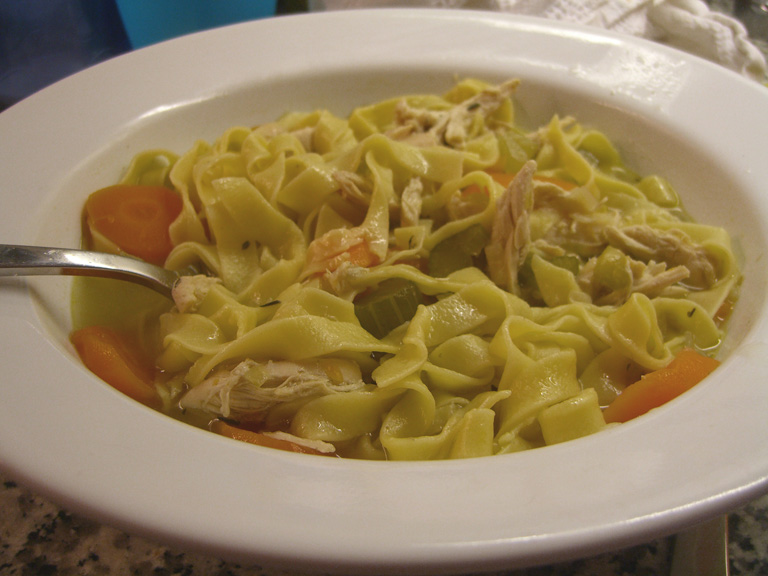
I've resolved to end my year of cooking with instant bouillon and make my own chicken stock. This journey began by saving and freezing the backs of each Chicken Marbella chicken I cut up. Six short weeks later my freezer was full and I was ready to attempt alchemy. No drama here - it was easy, quick, and tasty. I used half of it to make chicken noodle soup (I even made my own noodles - woohoo for me). Then I froze 1/4 cup portions in muffin tins so I can defrost only as much as I need. Now I'm all ready for cold weather cooking. I just need a bigger freezer.


solid gold ... chicken noodle soup

Some helpful distinctions:

  • stock - made with more bones than meat, which results in a fuller body than broth. Best for sauces.
  • demi-glace - stock than has been drastically reduced (10-15% of original volume). Good for gravies and sauces.
  • broth - made with more meat than bones, resulting in a fresher flavor but less body than stock. Ideal for soups.
Quick Homemade Chicken Stock from Cook's Illustrated
This stock can be refrigerated in airtight containers for up to 4 days or frozen for 4 to 6 months. Makes about 2 quarts

1 tablespoon vegetable oil
1 medium onion , chopped medium
4 pounds whole chicken legs or backs and wingtips, cut into 2-inch pieces
2 quarts water (boiling)
1/2 teaspoon table salt
2 bay leaves

1. Heat oil in large stockpot over medium-high heat until shimmering; add onion and cook until slightly softened, 2 to 3 minutes. Transfer onion to large bowl. Brown chicken in two batches, cooking on each side until lightly browned, about 5 minutes per side; transfer to bowl with onions. Transfer cooked chicken to bowl with onion. Return onion and chicken to pot. Reduce heat to low, cover, and sweat until chicken releases its juices, about 20 minutes. Increase heat to high; add boiling water, salt, and bay leaves. Bring to boil, then reduce heat to low; cover and simmer slowly until stock is rich and flavorful, about 20 minutes, skimming foam off surface, if desired.

2. Strain broth and discard solids. Before using, defat stock. After stock has been refrigerated, the fat hardens on the surface and is very easy to remove with a spoon. To defat hot stock, we recommend using a ladle or fat separator.

Sunday, September 24, 2006

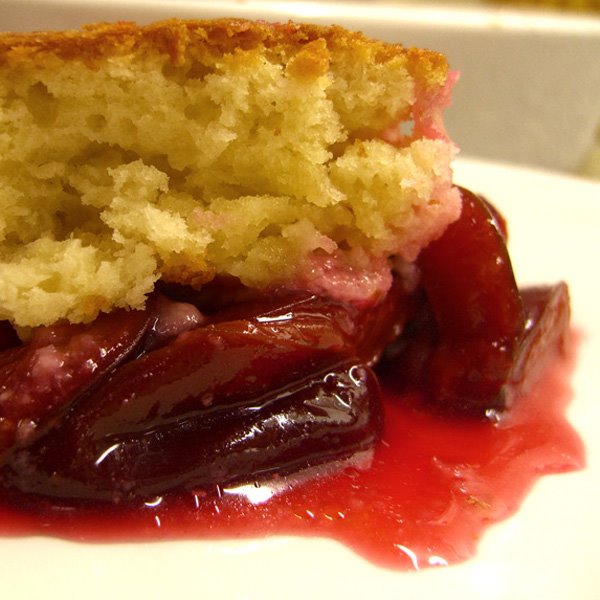
zwetschgen cobbler


My German teacher spent at least five minutes trying to explain what a "zwetschge" was before I finally looked it up in my dictionary: it's a plum. Back in CA, plums were usually round, juicy, and either light or dark purple. Zwetschgen are oval, tiny, dry, black on the outside and decidedly green on the inside. So you can see why I was confused. I later learned that there are about 20 plum varieties regularly available commercially and in the US, we generally consume Japanese varieties which have a clingstone pit and are juicier than the "European" plum.

Anyway... people go crazy for zwetschgen here, or any fruit really . In Zurich, you can tell the month by the type of fruit cake on the menu. So now every restaurant has a Zwetschgenkuchen, replacing August's Pfirsichkuchen and July's Aprikosenkuchen. Seasonal eating is fun but makes me panic - I'm afraid the season will end before I get my fill. So despite my better judgment, I made another dessert that will primarily end up in my own tummy. I really need more friends so I don't have to eat everything myself.

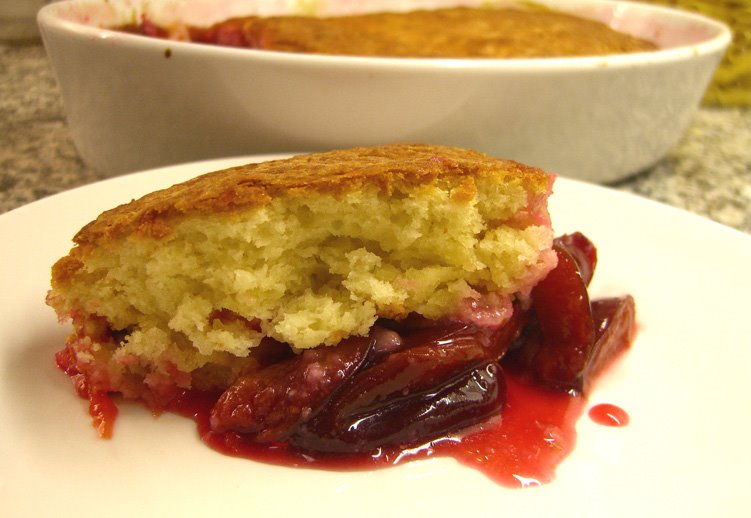
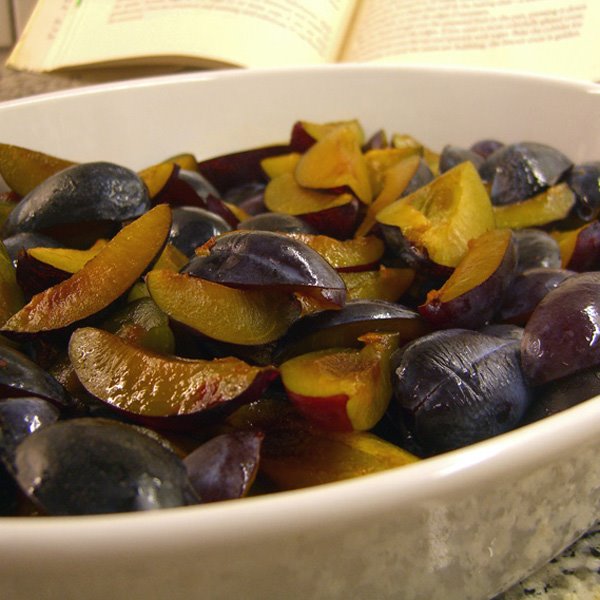
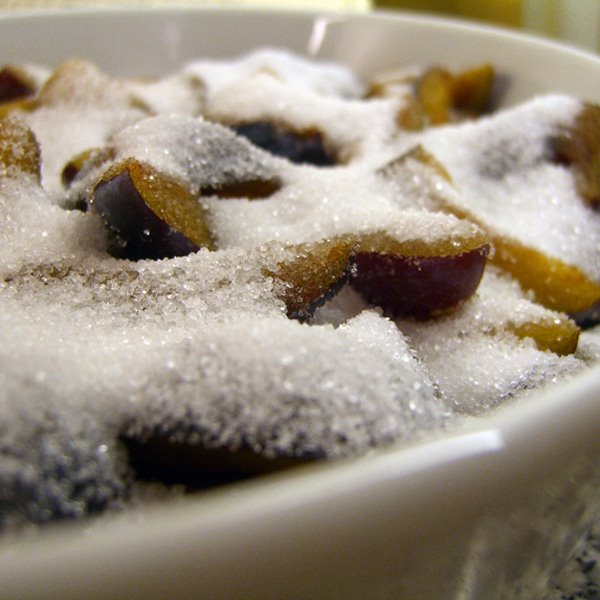
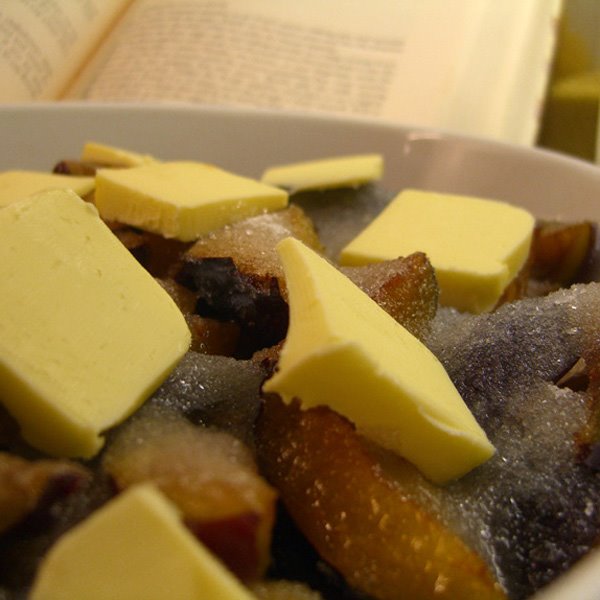
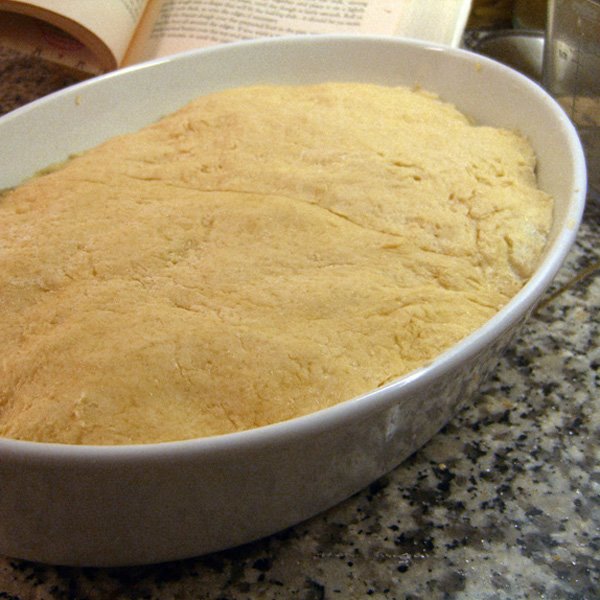
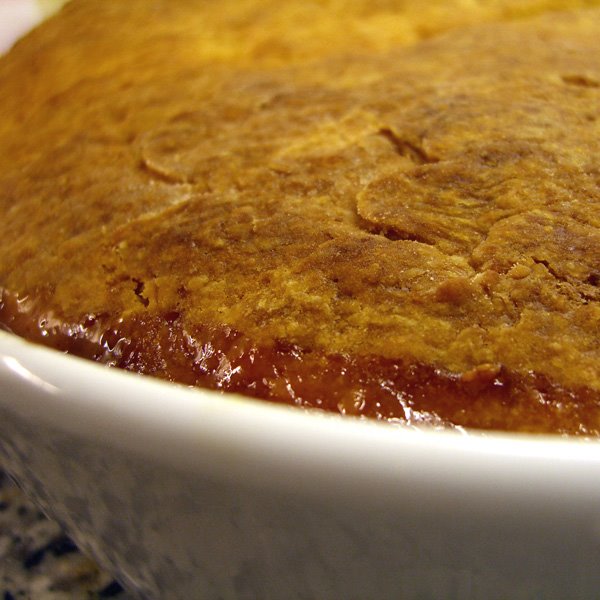
So here's the anatomy of my plum cobbler...
an admittedly humble offering compared to the fancy plum treats I've seen on various food blogs this month.


Prepare the filling
Preheat oven to 425F(220C). Pit and quarter one kilo plums.
Lovingly blanket them with 1.25cups sugar.
Drizzle 2TB of lemon juice and dot with 4TB of butter.


Make the bisquit dough
Mix 1 cup flour, 2TB sugar, 1/4tsp salt, 2tsp baking powder. Cut in 4TB butter. Lightly add 6TB cold milk. Knead on lightly floured counter 8-12 times until cohesive ball. Pat gently into pan shape and place over fruit. Tuck into sides, covering all the fruit. The recipe calls for an 8x8 pan. I doubled the dough to fit my oval dish.
Bake 35-40 minutes until golden brown. Serve warm with ice cream or whipped cream. Reheat leftovers for breakfast.(from Fannie Farmer's Baking Book)

Sunday, September 17, 2006

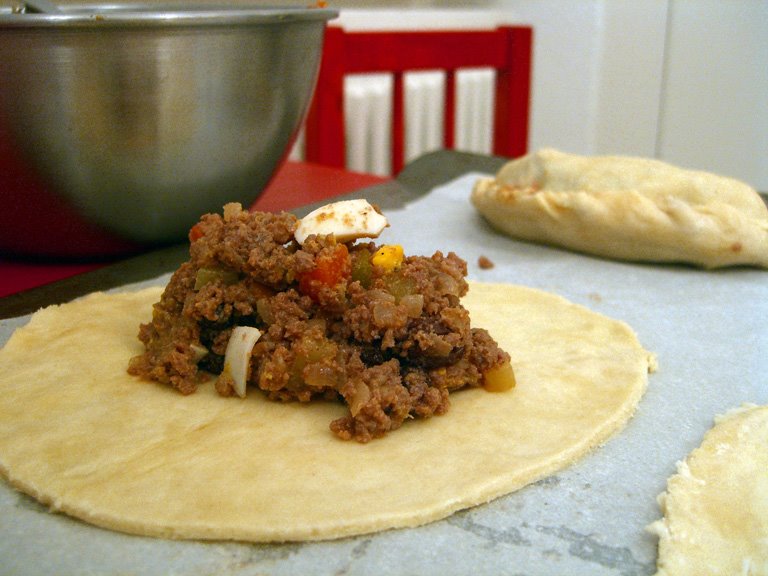
empanadas

About once a year, my husband tries to make an authentic empanada, which he fondly remembers from his years living in Argentina. Although delicious, they are never “just right”, suffering from some indescribable error in the dough or filling. But this time, we discovered at least one secret: lard! It turns out, not only is lard critical in the dough itself, but also in the filling. According to my husband, a real empanada should drip fat down your arms when you eat it.

In San Francisco, I would get my lard at the Mexican markets. But in Zurich, we had to settle for Schweinefett at the Jelmoli’s gourmet factory. I’m not quite sure it’s the same thing. The Schweinefett was bright white, while I think lard is more translucent and yellowy. Regardless, it creates a much more authentic flavor. I have a little leftover so I see some refried beans in my future. Yum yum.

Empanada Dough, from Joy of Cooking
I tried my favorite sour cream turnover dough, which was very good but maybe too fancy for this classic street food. This dough uses lard, which gives a more hearty flavor.

Place in a large bowl or food processor:
3 cups flour
1.5 tsp baking powder
1 tsp salt

Mix with a fork or pulse until combined. Add:
10 tbsp (5oz) cold unsalted butter, cut into small pieces
½ cup lard or shortening, cut into small pieces

Cut the butter and lard into the flour mixture using a pastry blender or pulse in a food processor until the mixture resembles coarse crumbs. If using food processor, transfer to a large bowl. Drizzle over the top:
11-13 tbsp ice water

Mix gently with a fork until the flour mixture is dampened enough to gather into a ball. Shape into a flat disk, wrap tightly in plastic, and refrigerate for a least an hour. (My counter can’t accommodate rolling out the whole thing, so I divide the dough in half and wrap each half separately).

Filling
After reading many empanada recipes, my husband threw the filling together from a general outline. I tried to capture what he did in this recipe, but I suspect there’s some magic in his method that I’m missing. Warning: this makes much more than the above dough can accommodate. Use your best judgment.

Heat in a large nonstick skillet over medium heat: ½ cup lard

Add: ¾ kilo onions, diced

Cook, stirring, until the onion is translucent, about 5 minutes. Stir in:
2 carrots, chopped
2 medium potatoes, chopped
~800 grams ground beef
1 TB salt
1 TB caldo or bouillon

“Slow cook” for maybe 30 minutes. Meanwhile, hard boil 3 eggs

Take off heat. Stir in:
½ TB paprika
1 TB cumin
2 TB sugar
1 cup raisins

Cool mixture. Stir in:
3 hardboiled eggs, chopped
~1/2 cup green olives, chopped

Refrigerate until ready to use.

Assemble & Cook
Preheat oven to 400F. Roll out the dough 1/8 inch thick on a lightly floured surface. Cut 6-inch rounds. Re-roll scraps as necessary. Spoon ¼ cup of filling onto one side of each round. Moisten the edges of the edges together to completely enclose the filling. Roll the edges for a decorative edge. Place 2 inches apart on a baking sheet. Optionally brush tops with egg wash. Bake until nicely browned 15-25 minutes (depending on the size of the empanadas), till golden brown.

Sunday, September 03, 2006

fraisage it


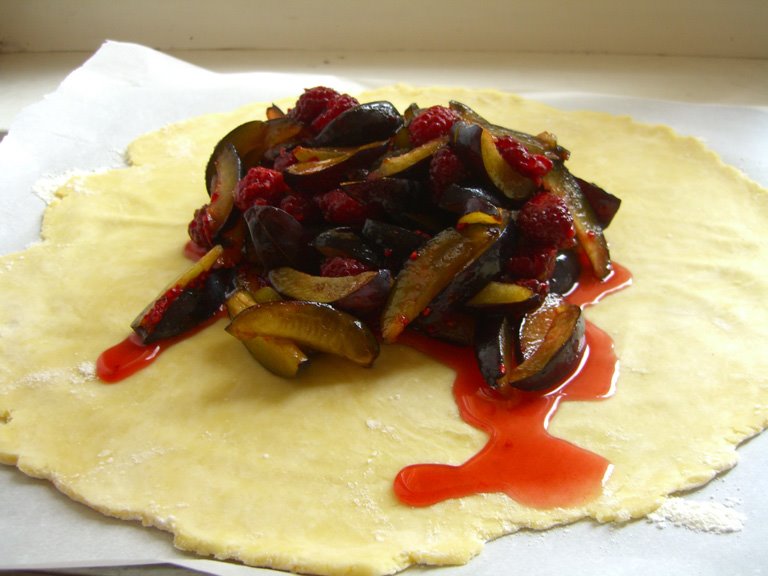
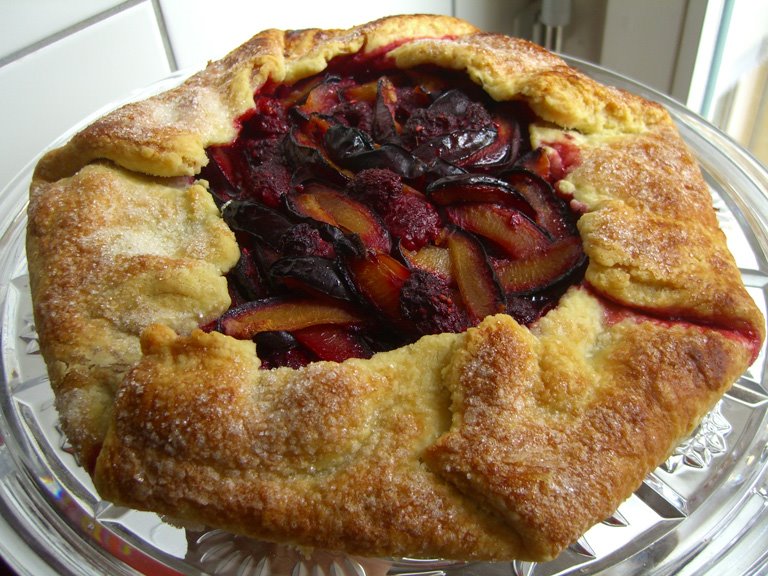
plum and raspberry free-form tart
In my opinion, the best thing about late summer stone fruit desserts is the dough: buttery pastries, nutty crisps, flaky bisquits, luscious dumplings - anything made with flour, butter, and sugar that can soak up those sweet fruit juices and still deliver a crunch. This free form tart is one of my favorites, using the "fraisage" technique, which practically guarantees fabulous flakiness in any butter dough. Once the dough is combined, you dump it onto the counter and smear it in sections with the heel of one hand. This changes the butter configuration into layers, instead of little bits. The recipe below from Cook's Illustrated introduced me to the technique, but now I use this on lots of my other pastry doughs, for pies, turnovers, etc,. with excellent results. Try it, you'll love it.

before, during, and after
Free Form Tart Recipe
Source: Cook's Illustrated, view full article & illustrations

Dough
1 1/2 cups unbleached all-purpose flour (7 1/2 ounces), plus additional for work surface
1/2 teaspoon table salt
10 tablespoons unsalted butter (1 1/4 sticks), cold, cut into 1/2-inch cubes
3 - 6 tablespoons water (ice cold)

Fruit Filling
1 pound peaches , nectarines, apricots, or plums (I used Zwetschgen plums and raspberries)
1 cup berries (about 1/2 dry pint)
3-5 tablespoons granulated sugar
1 tablespoon granulated sugar for sprinkling

Note: The amount of water that the dough will require depends on the ambient humidity; in a dry environment, it may need more water, in a humid environment, less. The dough can be made ahead and refrigerated overnight or tightly wrapped in two sheets of plastic wrap and frozen for up to one week. If at any point the dough becomes soft, sticky, and dificult to work with during rolling, chill it until it becomes workable.

1. For the dough: In food processor, pulse flour and salt to combine, about three 1-second pulses. Scatter butter pieces over flour, then pulse until texture resembles coarse bread crumbs and butter pieces about the size of small peas remain, ten to twelve 1-second pulses. Sprinkle 1 tablespoon water over mixture and process 1 second; repeat until dough begins to form small curds and holds together when pinched with fingers. Empty dough onto work surface; dough will be crumbly (if dough has large dry areas, sprinkle additional 2 teaspoons water over dry areas and incorporate by gently fluffing entire amount of dough with fingers). Using bench scraper, gather dough into rough mound about 12 inches long and 4 inches wide (mound should be perpendicular to edge of counter). Beginning from farthest end, use heel of a hand to smear about one sixth of dough against work surface away from you. Repeat until all dough has been worked. Using bench scraper, gather dough again and repeat. Dough should now be cohesive. Form dough into 4-inch disk, wrap in plastic, and refrigerate until cold and firm but malleable, about 1 hour.

2. For the filling: During last 30 minutes of chilling, prepare fruit. Halve and pit stone fruit and cut into 1/2-inch-thick wedges. Gently wash and dry berries. Combine fruit in medium bowl (you should have about 3 cups); set aside. Adjust oven rack to lower-middle position and heat oven to 400 degrees.

3. To assemble and bake: (If dough has chilled longer than 1 hour and is cold and hard, let stand at room temperature 15 to 20 minutes before proceeding.) On large sheet of parchment paper lightly dusted with flour, roll dough to 12-inch round about 3/16 inch thick, dusting with flour as needed. (If dough sticks to parchment, gently loosen and lift sticky area with bench scraper and dust parchment with additional flour.) Slide parchment and dough onto baking sheet and refrigerate until cool and firm yet pliant, 15 to 30 minutes (if refrigerated longer and dough is hard and brittle, let stand at room temperature until pliant).

4. Sprinkle fruit with sugar and toss gently to combine. Remove baking sheet with dough from refrigerator. Mound fruit in center of dough, leaving 2 1/2-inch border around edge. Carefully grasp one edge of dough and fold up outer 2 inches over fruit, leaving 1/2-inch area of dough just inside of fold free of fruit. Repeat around circumference of tart, overlapping dough every 2 to 3 inches; gently pinch pleated dough to secure, but do not press dough into fruit. Working quickly, brush dough with water and sprinkle evenly with 1 tablespoon sugar. Bake until crust is deep golden brown and fruit is bubbling, 50 to 55 minutes. Cool tart on baking sheet on wire rack 10 minutes. Using offset or wide metal spatula, loosen tart from parchment and carefully slide tart off parchment onto wire rack; cool until warm, about 30 minutes, or to room temperature, about 1 hour. Cut into wedges and serve.

Wednesday, August 23, 2006

zucchini bread

Here is my mother's zucchini bread recipe, well-used and much loved. It's fun to look at her handwriting each time I make this bread and remember a childhood full of baking. Even though I love this bread, I'm pretty sure it could use some updating. The 3TB vanilla seems excessive and other spices like nutmeg might add some flavor complexity. But there's something comforting about making the same, old thing over and over.
Zucchini Bread

Yield: 2 loaves or 4 mini loaves

  1. Preheat oven to 325°F (160°C).
  2. Grease and flour two loaf pans (or four mini loaf pans).
  3. Mix: 1 cup sugar, 1 cup brown sugar, 1 cup canola oil, 3 eggs
  4. Add: 3 TB vanilla, 2 cups grated zucchini (about 2 medium zucchini)
  5. In a separate bowl, combine: 3 cups flour, 1 tsp soda, ¼ tsp baking powder, 1 tsp salt, 3 tsp cinnamon
  6. Add above dry mixture to wet mixture and mix just until combined – do not overmix!
  7. Bake for 1 hour.
  8. Cool in pans for 10 mins. Then remove from pans and cool on wire racks until room temp.

Notes:

  • When adding dry mixture, I run it through a sifter to remove any lumps. The most common mistake with this recipe is lumps of baking powder or soda in the final product.
  • Use dark metal pans for best results.
  • You can make brown sugar by adding 1-2 TB molasses to 1 cup granulated sugar.

Friday, August 11, 2006

tamarind, pad thai, and other Asian adventures


tamarind paste
I desperately miss the wide spectrum of Asian cuisine available in San Francisco. My mouth is watering just thinking of my long-lost favorites: Zurich does have a decent showing of "ethnic cuisine", but every place I've tried so far has two big problems:
  • too expensive - every dish I've listed above (except Burma Superstar) costs less than $8. In Zurich, you're more likely to pay at least CHF18 for the most basic curry. And this is for chow, not fine dining. This is not the The Slanted Door.
  • too generic - most of the "Asian" restaurants I've seen in Zurich serve Chinese, Thai, and Indian (or other bizarre combos) instead of just one specialty, just like a bad chain restaurant in the states. Perhaps it's a strategy to appeal to the continental palate? It's not surprising that food is average and the different styles end up tasting quite similar. Yes, various Asian cuisines use similar ingredients and similar methods of preparation. But it's the small differences make each cuisine unique and interesting.

I fully admit that I have barely explored the restaurants in this town. So I optimistically hope there are some gems to be discovered. But each time I do go out, I'm so disappointed. Doesn't anyone in this town have a Tandoor so I can get some decent naan?
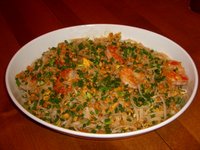
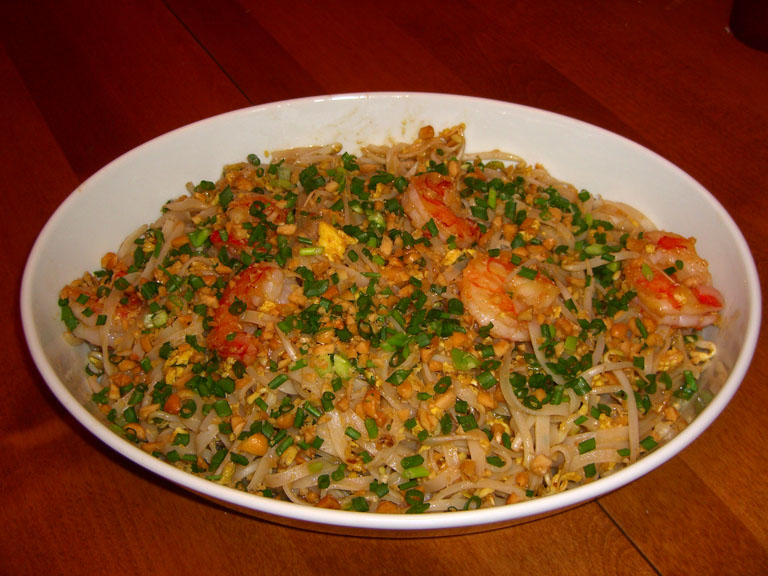
mise en place ... pad thai is served

Anyhoo... I'm attempting to make home versions of these favorites (the naan was a failure - I've tried twice and decided, for now, it's impossible). I'm a little intimidated by the unfamiliar ingredients and cooking techniques - but anything for flavor. I started with Pad Thai, an obvious, but much beloved Thai staple and I couldn't be happier. It was so much easier than I expected and it tasted great, if not authentic. I'm definitely working this into my regular rotation. The predominant flavor of Pad Thai comes from tamarind paste, which I was able to source from an excellent Asian market on the corner of Josefstrasse and Hafnerstrasse, behind the HB, a few doors down from El Maiz (which I'll save for another posting). It's not quite 99 Ranch, but it can cure some cravings. They also serve lunch, popular and not bad, but still mixed cuisine.

Up next... Is it possible to make good, dare I dream, great Phở Chín Nạc at home?

--------------------------------

P.S. What's up the term "ethnic cuisine"? How different does the other ethnicity have to be considered ethnic? If you live in France, is German food "ethnic"? It would also be interested how long it takes "ethnic foods" to be incorporated into the local cuisine, to the point where they are no longer considered "ethnic"? I'm also curious about how other ethnic groups linguistically refer to "American" food. If you live in China, are hamburgers labeled "ethnic cuisine"? Unfortunately, I suspect they just call it fast food.

--------------------------------

Pad Thai Recipe

From Cook's Illustrated...A wok might be the implement of choice in restaurants and the old country, but a large 12-inch skillet (nonstick makes cleanup easy) is more practical for home cooks. Although pad thai cooks very quickly, the ingredient list is long, and everything must be prepared and within easy reach at the stovetop when you begin cooking. For maximum efficiency, use the time during which the tamarind and noodles soak to prepare the other ingredients. Tofu is a good and common addition to pad thai. If you like, add 4 ounces of extra-firm tofu or pressed tofu (available in Asian markets) cut into 1/2-inch cubes (about 1 cup) to the noodles along with the bean sprouts. Serves 4 as a main dish

2 tablespoons tamarind paste or substitute (see Tamarind options in related articles)
3/4 cup water (boiling)
3 tablespoons fish sauce (available at Migros or Coop, look near soy sauce and coconut milk)
1 tablespoon rice vinegar
3 tablespoons granulated sugar
3/4 teaspoon cayenne pepper
4 tablespoons peanut oil or vegetable oil
8 ounces dried rice stick noodles , about 1/8 inch wide (the width of linguine)
2 large eggs
1/4 teaspoon table salt
12 ounces medium shrimp (31/35 count), peeled and deveined, if desired
3 cloves garlic , pressed through garlic press or minced (1 tablespoon)
1 medium shallot , minced (about 3 tablespoons)
2 tablespoons dried shrimp , chopped fine (optional)
2 tablespoons Thai salted preserved radish (optional)
6 tablespoons chopped unsalted roasted peanuts
3 cups bean sprouts (6 ounces) (available at Jelmoli grocery in a refrigerated section behind the fruit counter, along with other speciality Asian food ingredients. I think they're called "Sojabohnensprossen")
5 medium scallions , green parts only, sliced thin on sharp bias
1/4 cup fresh cilantro leaves (optional) (called Koriander here, available at most groceries)
lime wedges

1. Soak tamarind paste in 3/4 cup boiling water for about 10 minutes, then push it through a mesh strainer to remove the seeds and fibers and extract as much pulp as possible. Stir fish sauce, rice vinegar, sugar, cayenne, and 2 tablespoons oil into tamarind liquid and set aside.

2. Cover rice sticks with hot tap water in large bowl; soak until softened, pliable, and limp but not fully tender, about 20 minutes. Drain noodles and set aside. Beat eggs and 1/8 teaspoon salt in small bowl; set aside.

3. Heat 1 tablespoon oil in 12-inch skillet (preferably nonstick) over high heat until just beginning to smoke, about 2 minutes. Add shrimp and sprinkle with remaining 1/8 teaspoon salt; cook, tossing occasionally, until shrimp are opaque and browned about the edges, about 3 minutes. Transfer shrimp to plate and set aside.

4. Off heat, add remaining tablespoon oil to skillet and swirl to coat; add garlic and shallot, set skillet over medium heat and cook, stirring constantly, until light golden brown, about 1 1/2 minutes; add eggs to skillet and stir vigorously with wooden spoon until scrambled and barely moist, about 20 seconds. Add noodles, dried shrimp, and salted radish (if using) to eggs; toss with 2 wooden spoons to combine. Pour fish sauce mixture over noodles, increase heat to high, and cook, tossing constantly, until noodles are evenly coated. Scatter 1/4 cup peanuts, bean sprouts, all but 1/4 cup scallions, and cooked shrimp over noodles; continue to cook, tossing constantly, until noodles are tender, about 2 1/2 minutes (if not yet tender add 2 tablespoons water to skillet and continue to cook until tender).

5. Transfer noodles to serving platter, sprinkle with remaining scallions, 2 tablespoons peanuts, and cilantro; serve immediately, passing lime wedges separately.


Monday, June 19, 2006

limey

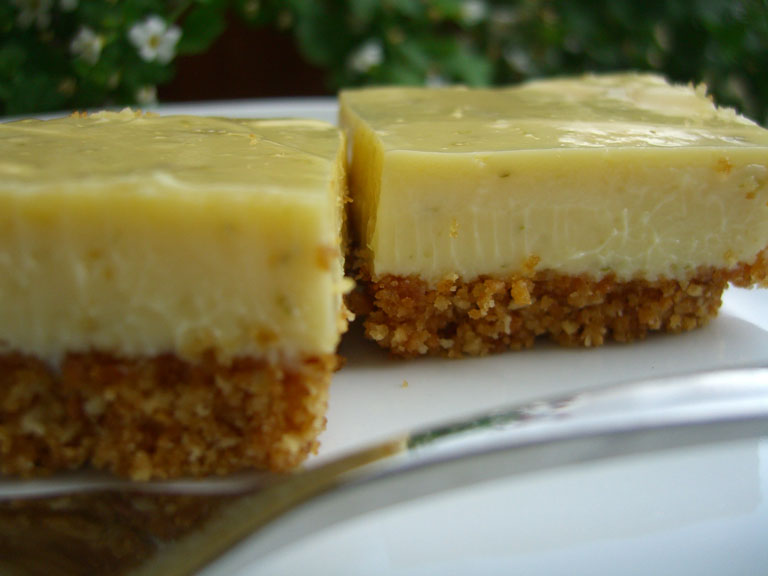
In memory of my favorite San Francisco ferry building treat - key lime tartlets from Miette - I made Key Lime Bars from a Cook's Illustrated recipe. Yum. In fact, I like all things lime. Lime sherbet (also from Cook's) is another favorite.
Crust
5 ounces animal crackers
3 tablespoons packed brown sugar (light or dark)
Pinch table salt
4 tablespoons unsalted butter , melted and cooled slightly
Filling
2 ounces cream cheese , room temperature
1 tablespoon grated lime zest , minced
Pinch table salt
1 (14-ounce) can sweetened condensed milk
1 egg yolk
1/2 cup fresh lime juice , either Key lime or regular
Garnish (optional)
3/4 cup sweetened shredded coconut , toasted until golden and crisp

1. Adjust oven rack to middle position and heat oven to 325 degrees. Cut about 12-inch length extra-wide heavy-duty foil; fold cut edges back to form 7 1/2-inch width. With folded sides facing down, fit foil securely into bottom and up sides of 8-inch-square baking pan, allowing excess to overhang pan sides. Spray foil with nonstick cooking spray.
2. TO MAKE THE CRUST: In workbowl of food processor, pulse animal crackers until broken down, about ten 1-second pulses; process crumbs until evenly fine, about 10 seconds (you should have about 1 1/4 cups crumbs). Add brown sugar and salt; process to combine, ten to twelve 1-second pulses (if large sugar lumps remain, break them apart with fingers). Drizzle butter over crumbs and pulse until crumbs are evenly moistened with butter, about ten 1-second pulses. Press crumbs evenly and firmly into bottom of prepared pan. Bake until deep golden brown, 18 to 20 minutes. Cool on wire rack while making filling. Do not turn off oven.
3. TO MAKE THE FILLING: While crust cools, in medium bowl, stir cream cheese, zest, and salt with rubber spatula until softened, creamy, and thoroughly combined. Add sweetened condensed milk and whisk vigorously until incorporated and no lumps of cream cheese remain; whisk in egg yolk. Add lime juice and whisk gently until incorporated (mixture will thicken slightly).
4. TO ASSEMBLE AND BAKE: Pour filling into crust; spread to corners and smooth surface with rubber spatula. Bake until set and edges begin to pull away slightly from sides, 15 to 20 minutes. Cool on wire rack to room temperature, 1 to 1 1/2 hours. Cover with foil and refrigerate until thoroughly chilled, at least 2 hours.
5. Loosen edges with paring knife and lift bars from baking pan using foil extensions; cut bars into 16 squares. Sprinkle with toasted coconut, if using, and serve. (Leftovers can be refrigerated up to 2 days; crust will soften slightly. Let bars stand at room temperature about 15 minutes before serving.)

Friday, June 09, 2006

cherry cherry bo berry

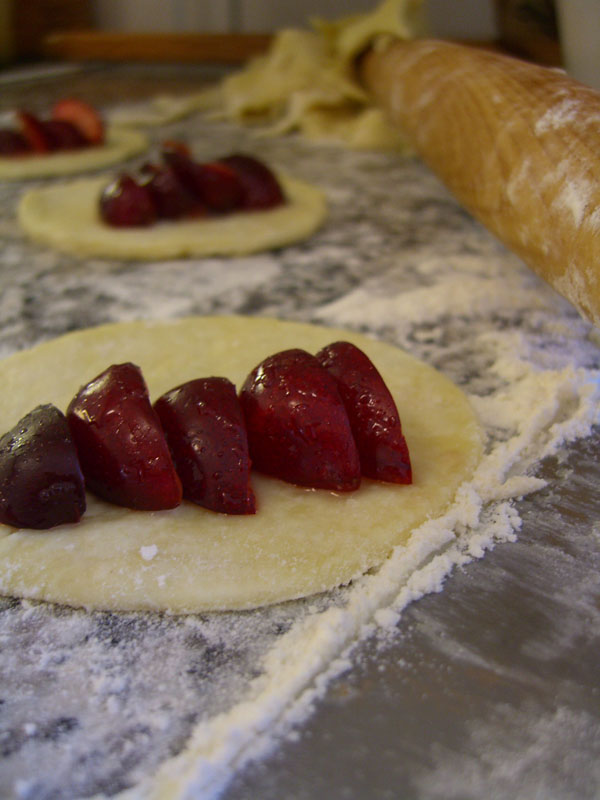
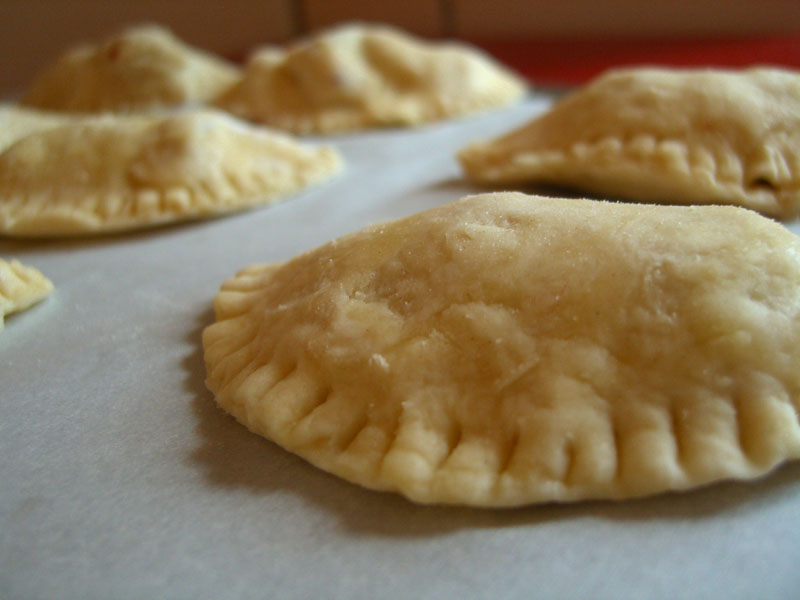
Why do all of my cookbooks only have one entry under "cherries": cherry pie? There must be hundreds of interesting things to do with this super seasonal delight. Let the search begin. But meanwhile, cherry turnovers will have to suffice. Despite seriously underestimating the amount of sugar required to make cooked fruit appropriately sweet (why do I always second second guess the recipe?), they are still quite yum!

Of course, turnovers are all about the dough (as my husband reminds me) and this sour cream dough was great. (I will post later about my other fav dough that uses a cool smearing method to create extra flakiness). The recipe (below) comes from The Fannie Farmer Baking Book, which has given quite poor results on several other recipes, so I was pleasantly surprised.

Preheat oven to 425F (220C). Lightly grease cookie sheet or line with parchment paper.

Sour Cream Dough: 1 cup flour, 1/2 tsp salt, 4 TB unsalted cold butter, 1/3 cup sour cream, 1 TB milk
Mix flour and salt. Cut butter into flour (like with pie dough) until resembles coarse bread crumbs. Add sour cream and mix lightly with fork until just moistened. Sprinkle on milk and mix again with fork. Gather dough in your hand and if it holds together, it's ready. Otherwise, keep adding a couple drops of milk until it does - don't get it too wet or mix too much. Once ready, form dough into cake 1-inch thick. Dust with flour. Roll into circle 1/8 thick. Cut 4.5-inch circles.
Fruit filling: 1.5 cups cherries, peaches, apricots, plums, or whatever. Pit and quarter the fruit.

Assemble: 7 TB sugar, 2 TB cream
Place a little fruit on one side of each dough circle - not too much or dough will break. I used about 3-4 cherries in each. Sprinkle about 2 tsp of sugar on each fruit mound - do not skimp! Fold over dough to form half-moon shape. Press edges together with fingers, then crimp with fork. Place turnovers on cookie sheet, about 1-inch apart. Brush top of each with cream then sprinkle with sugar. Bake for 20 mins until pastry is lightly browned (rotate once if necessary). Eat within one day.

Wednesday, May 31, 2006

marvelous marbella

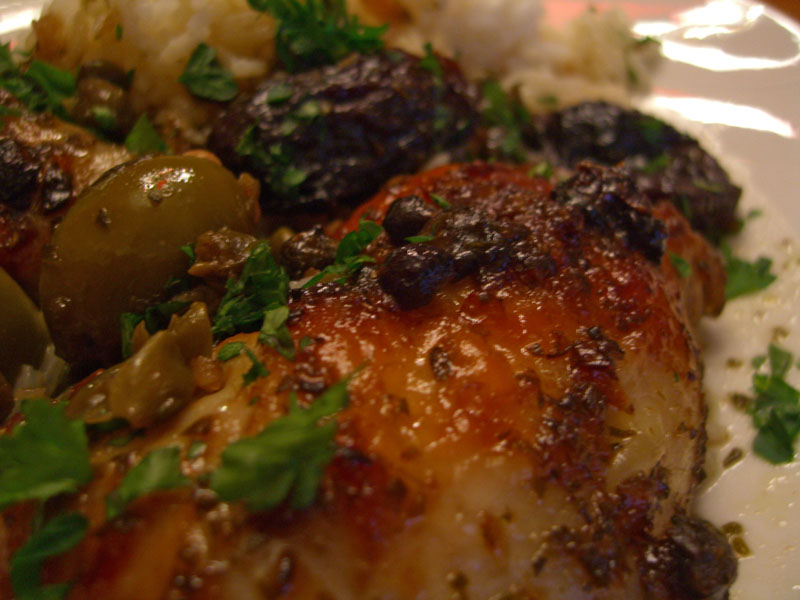
My friend, Rachel, made Chicken Marbella for me just after I had my first baby. It was so good we're still talking about it two years later. I finally got around to making it myself and we're hooked. I'm going to make it every week until we get sick of it. However, I found an error in my recipe, which may be contributing to our obsession for this dish. My recipe calls for either 4 chicken breasts and 4 thighs or 1 chicken quartered. I thought this was strange because 1 chicken quartered is clearly much less that 4 breasts and 4 thighs. This was especially evident when I tried "sprinkling" the cup of brown sugar over the 1 chicken quartered - that's a lot of sugar for one little bird. So when I looked for recipes on the internet, I discovered that most recipes call for at least 2 chickens quartered and some even 4, with the same ratios for the other ingredients. So the sugar in my dish has been 2-4 times the intended concentration. Shall I ignore this little detail and continue my sugary ways? Time will tell.

Monday, May 15, 2006

ribs

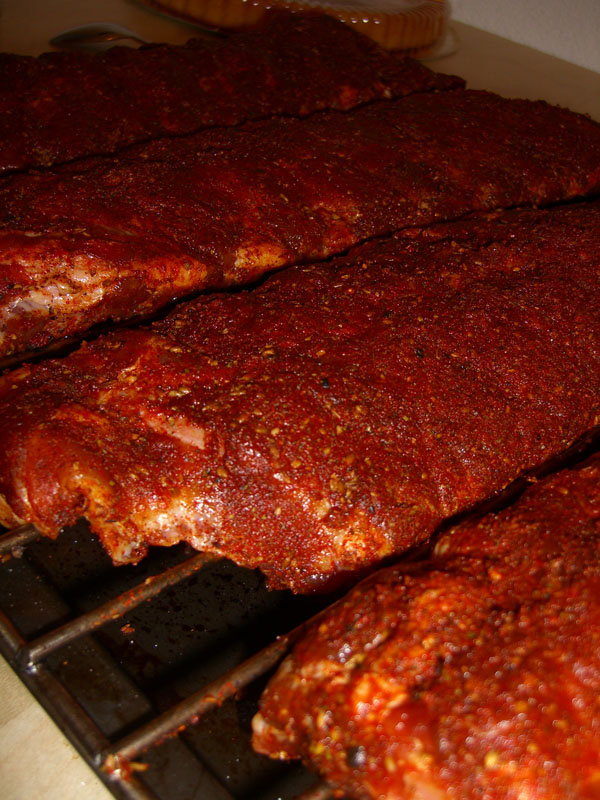
Just a reminder that pork ribs are so good. Get cooking.

My husband treated me to a special mother's day treat and wow! Best ribs I ever ate. He used the Cook's Illustrated recipe, which is members only, so I don't feel comfortable reposting it here. But I highly recommend subscribing to their website.
Related Posts Plugin for WordPress, Blogger...