Wednesday, April 04, 2007

sugary highs, creamy middles, & crunchy lows

Paris was so inspiring that I've returned completely overwhelmed and somewhat depressed. Perhaps it's better to not know what I'm missing. We ate high and we ate low. We ate good and we ate bad. I wish I could have eaten more, but there's only so much you can do when you are first experiencing a new city, particularly with a 3yr old in tow. Here's some of the things that went in my tummy during this trip:

- Restaurant d'Hélène was top notch: beautiful, inspired and delish. It didn't surpass the French Laundry, forever burned into my food brain, but it certainly reminded me why I love fine dining. Per usual, my favorite dish was the appetiser, a raw oyster in gelee with caviar and cream poured over the top (I took a pic of the menu to get accurate descriptions, but it didn't come out). Despite my general apathy for the "cart" strategy (of which this restaurant made extensive use), I loved the excellent cheese cart, which included a lush array of preserves to accompany the cheese (I chose cherry, fig and quince).


oyster "martini"

- Much farther down the price scale, but still excellent, was Au Trou Gascon, where contrary to form, I ordered well. The foie gras was perfect but my favorite was the cassoulet, which included melt-in-my-mouth pork belly. So yum.


the foie gras, of course

- Of course, we ate many, many crepes, a merciful option for anyone traveling with a 3yr old - quick, yummy & everywhere. However, we quickly learned not all crepes are equal - you must be sure that the crepes are made to order, not re-warmed (I was suprised how many places do this). We had our first crepes at the popular Creperie des Arts in the Latin Quarter - super yum. But another place recommend in a guide book which will soon be burned, served barely edible, rubbery, re-warmed nastiness. I immediately walked down the block to another place and downed a fresh nutella crepe to cleanse my palate. For me, nutella crepes in Paris are like gelato in Italy: I must have at least one every day.


what a big crepe you make


- We had a traditional lunch at old tyme bistro, Le Polidor, which was hearty and pleasant. I had a delectable braised leg of lamb, where the tasty meat was so tender it was falling off the bone. My husband had escargot as a starter, which were good while hot, but not as good as the Burgandy style according to an elderly patron sitting next to us. My fav part of this place was the bread cutter, a large blade set up like a paper cutter so the server inserted the bread and repeatedly pulled the blade down on the hinge to cut off bread slices.


escargot - yes, I ate one and it was good


- Chocolate & Zucchini wrote so highly of tartines that I trucked my exhausted family to the other side of town (with two Metro changes and a 15 minute walk) to try a tartine at Boulangerestaurant, recommended by C&Z. Unfortunately, they were not serving tartines (perhaps 2pm is too late for lunch?) and the sandwiches we ordered were somewhere between ordinary and not very good. The bread and pastries, however, were fantastic. On our last day in Paris, I stumbled on a promising looking tartine place that a few minutes after we were seated, developed a line outside assuring me that I made a good decision this time. These tartines were good and fun to watch being made by the workhorse behind the counter. This was another favorite food of our son, something to remember for next time.


my tartine with fromage blanc

- My favorite part of every day was breakfast. My husband would go out every morning to one of the many local bakeries and bring back a baguette, croissants, pain chocolat, etc. La Grande Epicerie was only two blocks away, supplying us with fancy jam and fresh butter. It was glorious. Croissants and baguettes really are different in France. I ate enough croissants to induce a heart attack, but I tried to counter by walking several miles a day.


breakfast of champions

Not every meal was great, but I ate well enough to make me start planning my next trip on my way home from this one. I can't wait!

Friday, March 23, 2007

have reservations, will travel

Destination: food, or rather, the culinary wonderland of Paris. After 14 years I finally return, this time with considerably more travel know-how and scratch than my college student self, who could barely afford a baguette. We have reservations at Restaurant d'Hélène and Au Trou Gascon. I haven't had a truly great meal since I left San Francisco and I'm not likely to have another until my next Paris trip. So I'm pinning all my hopes and dreams on every morsel consumed in the next few days. I hope I haven't set my expectations too high ; )

Wednesday, March 21, 2007

good pizza in Zurich?

OK, I recant my previous rash statement that all pizza is horrible in Zurich. I had a very nice pizza tonight at Santa Lucia in the Niederdorf - good crust, yummy toppings. And I've heard there are at least two other well-known places in town I should try. And of course, I've had plenty of horrible pizza back in the US. So I reconsidered my objections and decided that a) I complain too much and b) my real complaint is that pizza here is expensive. The personal pizza I had tonight was 25 francs (~$21). In Italy, this same pizza would have been maybe 8 euros (~$11). The most expensive pizza at Chez Panisse is $17. The most expensive at Spago Beverly Hills is $20 and it has caviar on it. Expectations change when you pay more. Yes, I live in Zurich where everything is overpriced so I should just get over it. But what's the fun of having a blog if you can't complain a little and commiserate with your friends?

Monday, March 19, 2007

mexican gelato?

To accompany my mex fest, I made gelato with Mexican chocolate. In short, Mexican chocolate is "toasted very dark...then coarsely ground over heat with sugar (and often cinnamon, almonds, and vanilla)...making a disc that more or less dissolves in milk or water, to drink" - Rick Bayless
It's my favorite hot chocolate. To make it properly, you pour hot milk over the chopped chocolate in a blender, then blend to create a thick foam. Yum yum.

As a starting point, I referenced this excellent gelato posting on The Traveler's Lunchbox. As described in this posting, the main difference between gelato and ice cream is that gelato uses only milk, not cream. This means a more intense flavor because the fat is a "flavor-blocker". You may be familiar with this principle with chocolate - e.g. hot chocolate made with water instead of milk is more intense and dissolving cocoa powder in hot water before adding to cake batter will create a more intense chocolate flavor. I digress.

So I adapted the Chocolate Gelato No. 2 on The Traveler's Lunchbox (adapted from an epicurious recipe) by substituting Mexican chocolate for the bittersweet chocolate and reducing the cocoa powder to 1/2 cup. This resulted in a hyper-chocolatey gelato that about knocked me out. I can't imagine what would happen with a full cup of cocoa. It was well-liked by all but with all this chocolatey goodness, the Mexican chocolate subtleties were practically obliterated.

So I tried again, this time eliminating the cocoa powder and got the result I wanted, basically the flavor of Mexican hot chocolate turned into a creamy, cold dessert (recipe below). It was also vaguely reminiscent of the famous Frrrozen Hot Chocolate at Serendipity3 in Manhatten (you must go if you're in town - it lives up to the hype).

Despite this, I was not completely satisfied with the texture. It was a little grainy/icy, not creamy enough. Next time I might try adding a tiny bit of vodka, recommended by a Cook's Illustrated sherbet recipe to create a smoother, more refined texture. Also, I might play around with the milk/sugar ratio. The CI recipe mentions that "...sugar makes it harder for water molecules to form ice crystals and thus lowers the freezing temperature of the mixture...sugar also reduces the size of the ice crystals, physically interfering with their growth. Smaller ice crystals translate into a less grainy texture."

Lastly, the TL recipe says to bring the custard to 160F and the epicurious one says 170F. Most of my ice cream recipes recommend at least 180F, which proved exactly right. If you don't get it to custard texture, there's no point in freezing the stuff.

Here's my final Mexican chocolate gelato recipe, adapted from The Traveler's Lunchbox:

2 ounces (4 triangles) of Mexican chocolate
1 1/2 cups whole milk
1 cup evaporated milk (whole milk is ok, too)
3/4 cup granulated sugar
4 large egg yolks

Have ready a large bowl of ice and cold water (to cool mix after cooking). Coarsely chop chocolate. In a 2-quart heavy saucepan bring milk, evaporated milk, and about half of sugar just to a simmer, stirring until sugar is dissolved. Remove pan from heat and add cocoa powder and chocolate, whisking until chocolate is melted and mixture is smooth. In a bowl with an electric mixer beat yolks, remaining sugar and salt until thick and pale. Add hot chocolate mixture in a very slow stream, whisking, being careful not to cook the eggs. Then pour the mixture back into saucepan. Cook custard over moderately low heat, stirring constantly, until a thermometer registers 180°F (don't let it boil - it will cook the eggs, yuck!). Pour custard through a sieve into a metal bowl set in ice and cold water and cool. Chill custard, covered, until cold. Freeze custard in an ice-cream maker. Transfer to an airtight container and put in freezer to harden for several hours.

Friday, March 16, 2007

mex fest

My father graciously hauled over 6 pounds of tortilla press from the US. After my first batch, I will never buy tortillas again. I was worried that my memories of fresh masa would taint my enjoyment. But thankfully, I was wrong and they were great. I even mastered the time honored technique of laying the tortilla dough on the hot griddle by sweeping my hand backwards over the grill (see video below).


Rick Bayless's Mexican Kitchen provides wonderfully detailed instructions for this simple task (I love this cookbook). They're so easy - mix 1 cup masa harina with 3/4 cup water, roll dough balls, press and toast on griddle for 15 secs on first side, 30 sec on next side, then another 30 seconds on first side again. Hold cooked tortillas in a kitchen towel or warmer. I learned a couple things:

  • cook longer than you think (a full 30 seconds on each side) or the middle tastes uncooked
  • the tortillas stay soft in the warmer so don't worry if they seem a little stiff after cooking
  • ziploc bags (cut open) are the perfect plastic for pressing - plastic wrap is too flimsy
  • non-stick skillet is not necessary. I used my cast iron pan. The tortilla sticks for the first few seconds but then releases (if the pan is the proper temperature)
And what would fresh tortillas be without guac and pico de gallo? Oh, Mexican food, I love you so!

Thursday, March 15, 2007

chocolate sprinkle donuts


Yet another food item that isn't quite right in Zurich: donuts. Yes, I can get donuts here, but they are rather dense, too bread-y, a little dry, a myrid of complaints. So I made my own. Is there a better way to use a whole quart of oil in one sitting?


nothing better than a loved one enjoying your creations


I used the Brioche Donut recipe from The Secrets of Baking by Sherry Yard, executive pastry chef at Spago Beverly Hills. It's good, but not exactly what I was looking for. On the good side, they were light and fluffy and relatively easy to make. But it wasn't sweet enough for me - only 1TB sugar for 20 donuts. Yes, the glaze can do a lot of the work. But I like my donuts to be able to stand on their own. Here's a couple things I learned:

- Despite the ridiculously sticky dough, I resisted adding more flour (yea, me!) and only lightly dusted to roll and cut. The dough was much easier handle than I anticipated. Don't let the stickyness scare you into over-flouring and thus toughening your dough.

- The hardest part is maintaining the oil temperature - between 350-360F, particularly on my lame electric range. Under 350, the donuts absorb too much oil. Over 375 and the oil starts to break down. When you put the dough in, the temp will drop slightly so you have to have the heat properly adjusted so the temp can recover quickly. You must carefully watch the temp the entire time - don't get distracted.

- Use milk chocolate for the glaze, duh. I tend to use at least 55% dark for all my baking so it didn't occur to me that it wasn't appropriate for a donut. Perhaps it would have worked if the donut was sweeter. But to my taste, the dark chocolate was too bitter for this treat.

- The glaze was too runny, leaving only the thinnest layer on the dipped donut. After the glaze cooled a bit, it thickened, which made it easier to get a thicker layer - so much better. Still the glaze wasn't nearly glossy enough. I might prefer a pwd sugar/milk icing instead.

- They really are only good for about 2 hours, then they get a little tough. The next day, positively gross. Eat them while they're hot.

- Lastly, people love donuts. This is a great way to make friends and influence people. :)


cutting out the dough ... ready to go


frying 'em up ... waiting for some glaze

Tuesday, March 13, 2007

american pie in europe

Although one of Switzerland's official languages is Italian, the pizzas in Zurich are nothing like Italian ones. In fact, most are pretty horrible. So like everything else here (except cheese, bread and pastries), I have to make it myself. I finally got a copy of "American Pie: My Search for the Perfect Pizza" by Peter Reinhart and proper pizza making has finally begun in my kitchen. I tried the Margherita pizza with Neapolitan dough and it was great, although it must be enjoyed within minutes of exiting the oven before it was hardened into something else entirely. The dough is finally exactly what I've been looking for. It stays super crisp, it's flavorful, and it's thin - almost too thin. As I started to shape it, it quickly got paper thin and I had to handle it more carefully. My oven goes to about 280C and the pizzas cooked in 7 mins (with pizza stone). I tried a pesto pizza and it burned to a literal crisp after 4 mins - not sure why. I have a lot to learn and a lot of experimentation to do. But with this crust, I'm inspired. If only I could recreate my favorites from Pizzetta 211 in San Francisco...

Now for the book itself. Although the recipes are good so far, the pizza "hunt" story was disappointing. I prefer the more obsessive research style of a Jeffrey Steingarten, a man who tasted 35 ketchups on 10 large orders of fries in his "Festival of Ketchups, a grand competitive tasting." So the sparse tasting research done, or at least documented in the book, by Mr. Reinhart was pretty lame. His trip to Italy included only a couple tastings in select cities at the most recommended restaurants. When the "best" place was closed, he just tried another down the street since he was only in town for a day. Yes, this is probably a more efficient method but completely doable by any average pizza lover. I'd much rather read about a manic foodie devouring numerous samples all over the map, camping out for days if necessary, actually discovering something rather than just confirming the general consensus. He claims to have tasted many pizzas in New York, but text focuses on an uninteresting account of various "Ray's" pizza joints (which in his own admission, is already better documented in an independent film). To his credit, he does dedicate three whole pages to Pizzetta 211, my fave pizza place in my old San Francisco neighborhood. So clearly he has good taste (wink, wink). The problem is: where is the info? I could forgive everything above, if he eventually boiled his experience down into a detailed account of what makes each pizza style different and how these styles have evolved. Some of that is embedded in the rambling story but I had to work too hard, for too little. However, it still services as a cookbook and that's why I bought it. Enough said.

more gadgets

Here are two more of my favorite kitchen gadgets...


My garlic mincing skills have much to be desired, so I typically use a garlic press instead (yes, I know the flavor is different). My old garlic presses were really hard to press - I often had to wedge it against the counter and throw my whole weight against it. So I upgraded to the Zyliss Susi Deluxe garlic press, which I love! It's easy to press, even easier to clean and I don't have to peel the cloves before pressing. Unfortunately, this model is out of production now, but here's a review of the new Zyliss models.


My newest "gadget" is a flour duster, for dusting countertops before kneading or rolling out dough. Before I would simply use my hands or a spoon to spread flour lumps around, which always resulted in much too much flour, unevenly distributed. The duster gives a even, thin layer. It's a simple, silly thing but it makes me a happier baker.

Sunday, March 11, 2007

birthday cupcake


I'd never made a birthday cake that I like. They are usually edible (particularly with some ice cream), but a little too dry or too dense for my taste. I almost started to think that perhaps it wasn't my baking, but that I just don't like cake (I rarely like cake at restaurants either). But finally, I made a cupcake I adore and that was also a hit with my guests. So much so that I immediately made a second batch. To get evenly sized cupcakes, I put the muffin tin on the scale as I portioned out the batter to make sure each cup got the same amount. I discovered that exactly 2 ounces of batter created the perfect cupcake that didn't spill over, thus avoiding an unsightly lid that is difficult to frost.

I even loved the frosting (it looks a little dry in the picture, but it was creamy and delicious!), which is usually the worst part since I hate buttercream and every cookbook I own seems to think that buttercream is the only and/or best choice for a birthday cake. The frosting needs some adjustments to improve the glossiness, but it's certainly on the right track. I used about 65% dark chocolate for the cake and about 50% dark for the frosting (it was for my 3rd old's birthday so I didn't want to go too dark).

I used the Cook's Illustrated Dark Chocolate Cupcake recipe with their Chocolate Ganache frosting. There are two important elements of this cake: a) a small addition of sour cream, giving a little tang and more moistness and b) melting together the cocoa powder, chocolate, and butter before adding to the batter - releases more chocolate-y goodness!

Wednesday, February 28, 2007

baking soda


What's a girl to do when she uses up the last 1/4 tsp of baking soda in her cupboard for pancakes? In Zurich, she must visit every store in town before finding these precious little Natron packets. At one precious teaspoon per packet, I had to empty out the store to feed my baking habit for the next couple months. Yes, baking soda (aka Natron) is available in Zurich. However, "available" really means "rare commodity".
Here's where you can find Natron:
- Coop St. Annahof on Bahnhofstr.
- Coop online grocery
- maybe MMM Migros at Glattzentrum (I think I bought a big bottle there once)
Here's where you cannot find Natron:
- Jemoli (I'm very disappointed in you, Jemoli!)
- Migros Zurich City (on Löwenstrasse near Globus)
- Migros Brunau Park
- Leshop.ch (Migros online grocery)

Tuesday, February 27, 2007

can can

My new favorite gadget: the safe edge can opener. Yes, I get excited by little things. This can opener magically removes the top without leaving any sharp edges. The top can even fit back on for temporary storage. I saw one demo'd at a Tupperware party; but at 50CHF, I wasn't quite sold. I found this Zyliss model at Coop for about 25CHF and it's my new best friend.

Wednesday, February 21, 2007

bagels, take two

I tried the mini-bagels again, with a few experiments...

- Heat. I increased the heat to 220C from 200C. They're better but I think I can go higher. Next time 230C. I'd prefer to cook shorter time at higher heat so the inside stays moist and the crust gets darker and crisper.

- Flavor. I made them cinnamon raisin this time, adding 2 tsp sugar, 1 tsp cinnamon, and 1/3 cup raisins. (I forgot the vanilla extract recommended by another recipe - I'll try that next time.) After boiling, I sprinkled the top with cinnamon sugar. I served them with cream cheese mixed with my favorite honey. So yum!

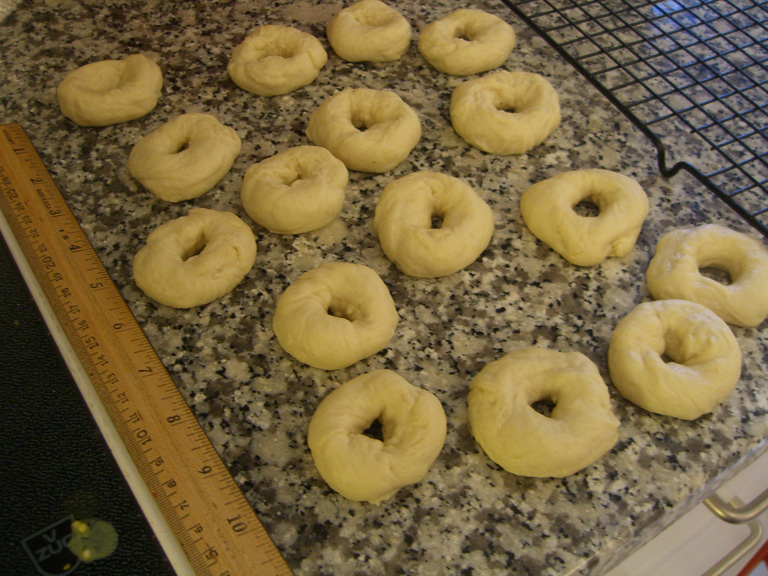
- Shaping. Last time I rolled the dough into balls and stuck my finger through to create the hole. They were really lumpy. So this time I rolled them into ropes them connected the ends (see pic below). They are much smoother and prettier, but a couple broke into cresents during boiling.

- Dough. I added about a tablespoon more water to the dough because it seemed really dry. This tiny amount made it mucher wet than last time and suprisingly, easier to shape handle after the rise. It was less sticky and easier to shape into smooth ropes. Also, I oiled the bowl the dough rose in and this seemed to make the dough smoother as well.

Tuesday, February 20, 2007

hot pot, no-knead...


Whatever you call it, I just call it delicious. I finally tried the famous no-knead bread from from Jim Lahey, Sullivan Street Bakery. (Read more about the phenomenon on Slashfood) WOW! Despite my bumbling, it was soooo good - chewy, flavorful, crisp crust, best I ever made. Here's the glamour shot of the wonderful holey structure.

I reviewed numerous blog postings on this recipe before attempting it myself. Based on my reading, I made two modifications to the original recipe: reducing the water to 1 1/2 cups and reducing the cooking time to 20 mins lid on and 20 mins lid off. I checked the internal temp (215F is the desired temp) periodically during the last 15 minutes to make sure I didn't overcook it.

The most important tip I found was from Rose Levy Beranbaum, regarding the transfer of the dough to the hot pot. She shapes and proofs the dough on a silpat sheet so you can just hold the sheet over the hot pot and let it drop off into the pan. This made the transfer super easy. Here are links to her very useful postings on this no-knead bread:

- hot pot bread story in pictures
- baby hot pot bread alternative - part 1, part 2

I made one big mistake - wrong pot size. I foolishly used my oval Le Creuset pan, thinking that the dough would magically stretch out into an oval shape. Instead, the hot pot seared the dough immediately into the shape when it hit the pan, thus creating the weirdo shape you see below. Next time I'll search my camping gear for my trusty circular Lodge dutch oven to create a more suitable environment.


dough inadequately supported by oval pot

resulting weirdo shape

Saturday, February 17, 2007

fluffy stuff - sugar cookies

I've tried lots of sugar cookies recipes (even my trusted Cook's Illustrated) without finding what exactly I wanted. Most recipes deliver a thin, crispy cookie, that often taste too much like butter or flour instead of like a cookie. Of course, I had a model in my mind - a thick, soft, semi-sweet cookie made by my best friend's mother, Donna. I don't why it too me so long to ask for the recipe, but finally I have it and dream has become reality. They are perfect!
The first trick is rolling out the dough thicker, duh. About 1/4 inch instead of 1/8 inch. My best friend, Leslie, also gave me this advice: "I am a firm believer that the secret to any great homemade cookie is beating up the butter/sugar and eggs/liquids tons until light and fluffy before ever adding any dry ingredients." When I read this, it sounded like standard cookie technique. But based on the wonderful results this time, probably something I hadn't paid enough attention to in the past. Here's a pic of my fluffy stuff, pre-dry stuff:
Thick, Soft Sugar Cookies
makes about 30 cookies
12 TB butter (6oz)
1 cup sugar (7oz)
2 eggs
1 tsp. vanilla
2.5 cups all-purpose flour
1 tsp baking powder
1 tsp salt
  1. Beat butter and sugar until very light and fluffy. Add eggs and vanilla and beat 2 more minutes. Add dry ingredients and mix until incorporated.
  2. Chill dough for 1 hour. It’s easier to roll out the dough later if you first shape dough into two disks, about 4 inches in diameter, and then wrap each tightly in plastic wrap. (I don't know if this step is really necessary. Sometimes I immediately roll in parchment and chill from there. I think the chilling is just to make the dough more manageable.)
  3. Roll & cut. Roll dough thicker than you think you should, approx ¼ inch. The dough warms up very quickly; in about 5 minutes out of the fridge, the dough is a sloppy, buttery mess. So it’s best to roll the dough between parchment paper, then freeze or refrigerate until very cold, then cut very quickly. This technique also prevents the dough from spreading as much in the oven (if bake immediately after cutting), thus preserving more delicate shapes.
  4. Bake on ungreased sheet at 400F degrees (205C) for about 7 minutes. Remove just before they start to brown, but they no longer look dough-y. Allow to cool briefly on the pan, then transfer to a rack. Frost & decorate & enjoy!
Quick White Icing (from Joy of Cooking)
Makes about 1 cup. This is my standard icing for decorating with kids. For a more sophisticated glaze, just thin with milk until desired consistency. Heating the icing supposedly eliminates the raw flavor of the cornstarch in the pwd sugar, while making the icing more creamy and more intensely flavored. You be the judge.
Melt or heat in the top of a double boiler over low heat:
4 TB (2oz) unsalted butter or 3 TB heavy cream
Remove from heat and stir in:
2 cups powdered sugar, sifted if lumpy
3 TB milk
pinch of salt

Cook, stirring occasionally, over barely simmerig water for 5 minutes. Remove from the heat and add:
1 tsp vanilla
Beat until cool and the desired consistency. Keeps for up to 3 days at room temperature, 3 weeks refrigerated, or 6 months frozen.

Tuesday, February 13, 2007

cheerio-o-o

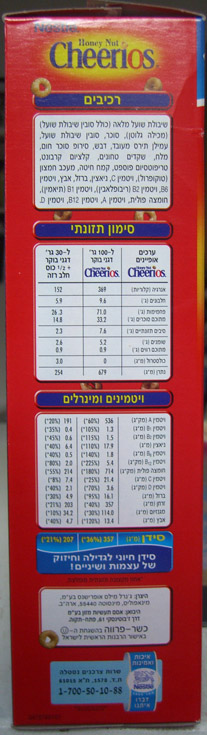
Never underestimate the power of sugar cereal! One bowl of Honey Nut Cheerios and I was dancing in the streets, singing in the rain. How many bowls can I eat in one day without reversing the trend to a downward shame spiral? Some sugar cereals are available at the regular groceries, but lots of special American treats happen to be available at the Jewish groceries in my neighborhood. We're not sure why, but we think perhaps because they are kosher. I'm guessing that the writing on the box is in Hebrew, but it could be Russian for all I know. In any case, it sure looks cool.

Monday, February 12, 2007

flour redux


After many more hours of internet research since my last flour posting, I'm still as confused as ever about the flour available in Switzerland/Europe. Why can't I buy high protein white flour??? It doesn't make any sense given all the fabulous bread available here. My only guesses are either a) euro flour is different and doesn't need to be high-protein to create highly structured bread or b) high-protein flour is available, but only to professional bakers or c) great mail-order flour sources exist but my terrible german/french/italian google skills are preventing me from finding them. I have a hard time believing hypothesis A or B so I'm hoping to find someone to help me with C. Is there some flour freak out there that can help me? Please!

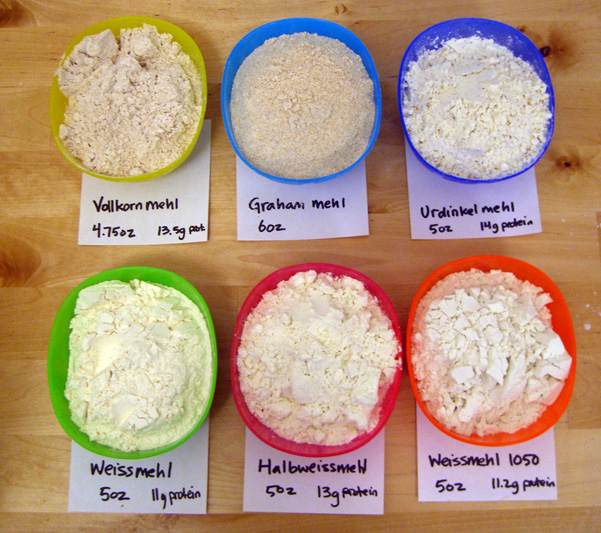
In the absence of documentation, I'm resorting to manual tests. I started this morning by weighing my various flours (shown above), just to see what I'm dealing with. After doing this, I realized this was pointless, only motived by my sleep-deprived state. But it does provide a nice visual for this posting. I still need to purchase the "typed" flour available at Reformhaus. And I'm also still planning to drive the three hours to France and Italy to buy some of their flour, since apparently no one wants to sell it to me over the internet.

My next project is to make various recipes with different flours to see what happens, comparing structure (tightness of grain), height, and flavor. Here's my plan so far:

sandwich bread
· weissmehl 405, 550, and 812
· zopfmehl
· halbweissmehl
· ruchmehl

ciabatta and pizza dough
· weissmehl 812
· halbweissmehl
· ruchmehl

Random lingering questions:
· What is the difference between regular weissmehl and zopfmehl? The protein level is the same.
· What exactly are halbweissmehl and ruchmehl? I know they are part whole wheat, but what does that mean? What percentage whole grain is in these?

bagel, bagel, who's got the bagel?

Inspired by my friend at La Cerise, I made the mini-bagels she made from the Delicious Days posting. Of course, I first consulted my cooking bible, aka The Best Recipe by Cook's Illustrated. According to their tests, bagels should only be made with high-gluten flour (14g plus), which makes them more elastic, lighter, smoother, chewier, taller, etc, etc. This article threw me into another tailspin of internet research on flour available in Switzerland/Europe (read more here...)

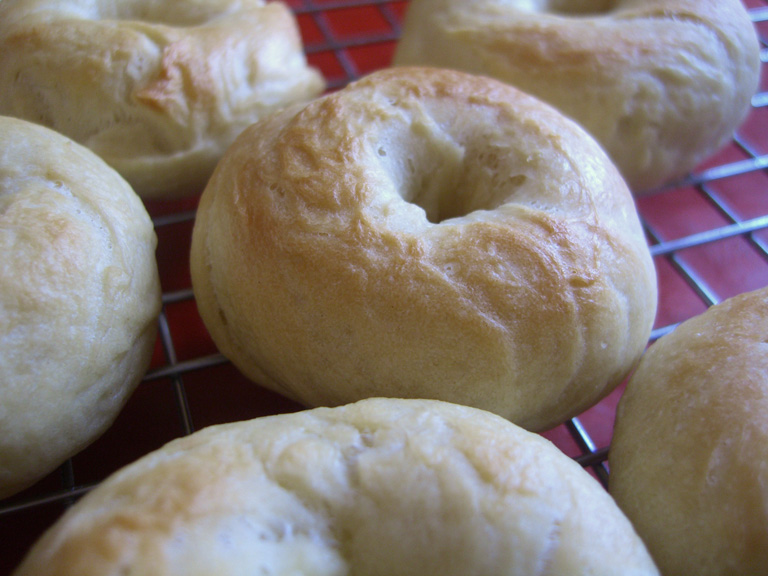
Anyway, I tried the bagels with Halbweissmehl, with pleasing results. But there's certainly lots of room for improvement. Here's what I learned today:
  • Halbweissmehl at 13g protein provides decent, if not excellent structure. I still may import some high-gluten flour, but I'll keep baking in the meantime.
  • My bagel shaping needs serious help. I may try the technique from The Best Recipe, where you roll dough segments into ropes then form into circles, pinching the overlapped ends together. This is bound to make them smoother.
  • 200C was not nearly hot enough. After 15 minutes, my little bagels were barely golden. I'm going to try 220C next time.

And now for my bagels story, in pictures:


dough cut into 16 pieces ... then made into bagel shapes, kinda


boiling a mere 30 seconds ... out of the oven


with a little homemade apple butter...yum yum!

Friday, November 24, 2006

lumpy

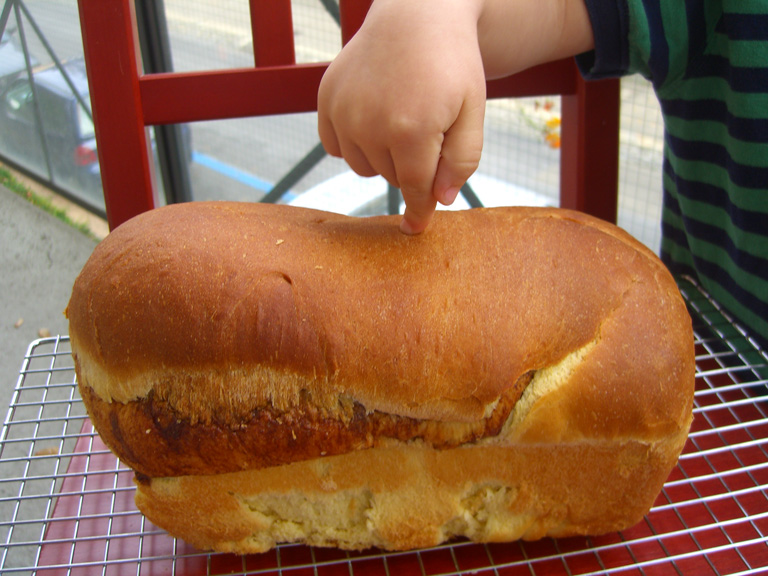
Based on this example, it's probably hard to believe that I really have made many beautiful loaves of bread. This cinnamon swirl bread looked normal when I put it in the oven but quickly grew into a monster after only a few minutes in the heat. Aaaah!

Friday, October 13, 2006

apple butter


I learn many things in my German class. Last week I learned that, despite my protests, apples cannot be made into "confiture". Apfelmus, ja, Apfelconfiture, nein. Perhaps this because "apple butter" has not yet infiltrated this otherwise apple-saturated region. But to an American (or at least this American), apple butter is synonymous with autumn and must be consumed for this season to be properly celebrated. In case you were wondering, applesauce is cooked apples processed in a blender or a food mill, while apple butter takes this a step further adding spices and cooking the applesauce down into a thick, gooey spread. And unlike jam or preserves, you don't add pectin to fruit butter.

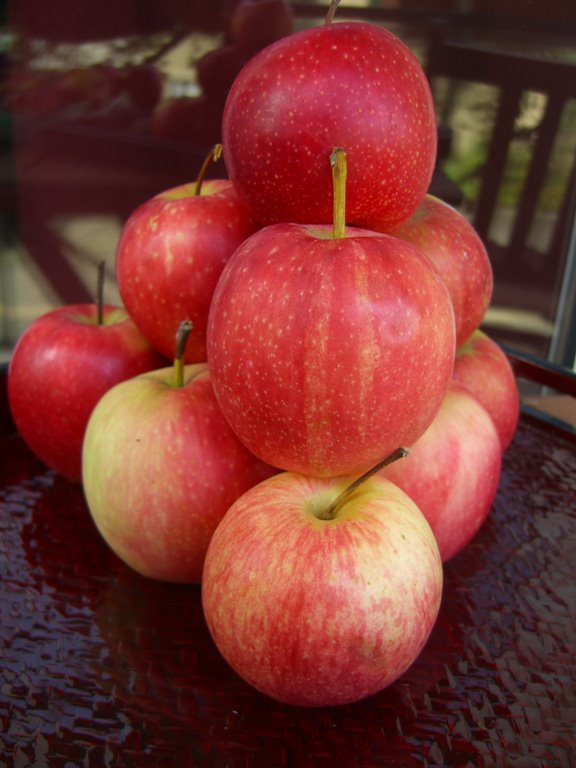
I tripped over boxes of Elstar apples at my corner grocery, priced at 5 kilos for 5CHF. I'd never heard of this apple variety before, but at the price, I could afford a gamble. What a find! This apple tasted like an apple.
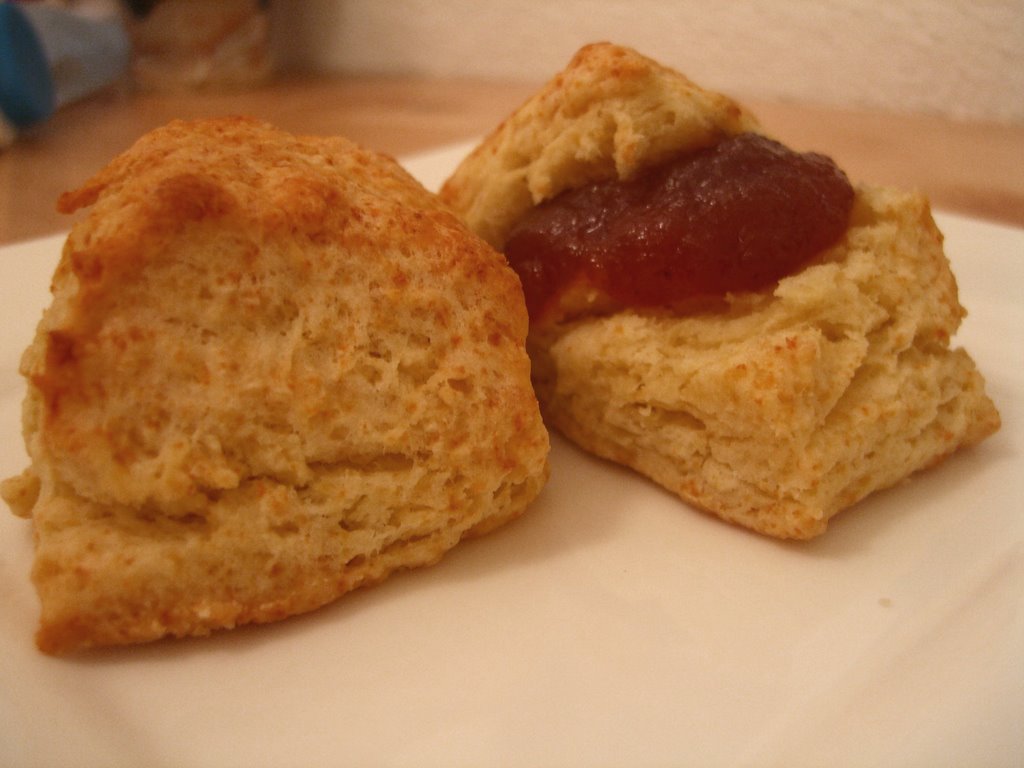
Seriously, just think about exactly what an apple should taste like and this apple tastes like that. It was almost surreal. Of course, the perfect eating apple doesn't always make the perfect baking apple (link to apple chart). But I was willing to try. Three days and 12+ hours of slow simmering later, my 5 kilos had shrunk into 1 quart of mouth watering goodness just waiting for me to bake some biscuits on which to eat it (recipe below). Now I'm inspired to make more fruit butters. I think I'll start with plum and pumpkin.

Most recipes are generally the same:

  1. peel and chop apples
  2. simmer with some cider until apples break down
  3. add sugar, lemon juice, and spices (cinnamon, cloves, allspice)
  4. simmer on lowest heat until desired consistency (6-12 hours)
  5. can it, processing for about 10 minutes

Here's one recipe I used as reference. My experience shows that specific proportions and time are not particularly important. This is definitely a recipe you can feel and taste your way through, even if you're not that type of cook (I am not that type of cook). However, there are some important things to note:

  • don't add too much liquid/cider. The more you add, the more you have to simmer that sauce to evaporate it out. Start with just a little liquid so the apples don't stick and add more at the beginning (first hour) if you feel the need. Again, most recipes call for much more than you really need
  • don't add too much sugar. Many recipes called for 2-1 apples to water ratio. I added half this much and wondered if I still had added too much.
  • just give in and buy that food mill - the plastic Mouliere model is inexpensive but solid. You'll be thanking yourself every time you have don't have to spend an hour shoving some stupid sauce or chili paste through a stupid sieve. Just do it!
  • experiment with the flavoring - I've seen recipes call for ginger, molasses, red hots. If you make a lot, separate it into different batches near the end and add different spices

P.S. I recently read that most apples we consume are over 6 months old, having been placed in man-made hibernation. Yuck. Check the story.
P.P.S. This site has a very comprehensive guide on apple varieties: http://www.applejournal.com/use.htm

Buttermilk Biscuits
Adapted from Cook's Illustrated. Makes 1 dozen

2 cups unbleached all-purpose flour
2 teaspoons baking powder
1/2 teaspoon baking soda
1 teaspoon granulated sugar
1/2 teaspoon table salt
8 tablespoons unsalted butter chilled, cut into 1/4-inch cubes
3/4 cup buttermilk plus 2 - 3 tablespoons additional, if needed

1. Set rack at middle position and heat the oven to 450°F (230C).

2. Mix or pulse first 6 ingredients in a large bowl or the workbowl of a food processor fitted with steel blade. With your fingertips, a pastry blender, 2 knives, or steel blade of the food processor, mix, cut, or process butter into the dry ingredients until mixture resembles coarse meal with a few slightly larger butter lumps.

3. If making by hand, stir in buttermilk with a rubber spatula or fork until mixture forms into soft, slightly sticky ball. If dough feels firm and dry bits are not gathering into a ball, sprinkle dough clumps with additional tablespoon of buttermilk. Be careful not to overmix. If using food processor, pulse until dough gathers into moist clumps. Remove from food processor bowl and form into rough ball.

4. With lightly floured hands, knead a couple times to make a cohesive mass (it will be sticky!). Then press into a square. Use a bench scraper (or knife) to divide dough into 12 equal portions. Place 1 inch apart on ungreased cookie sheet or pizza pan. Brush dough tops with melted butter or milk. (May be covered with plastic wrap and refrigerated for up to 2 hours.) Bake until biscuit tops are light brown, 10 to 12 minutes. Serve immediately.

Thursday, October 12, 2006

liquid gold


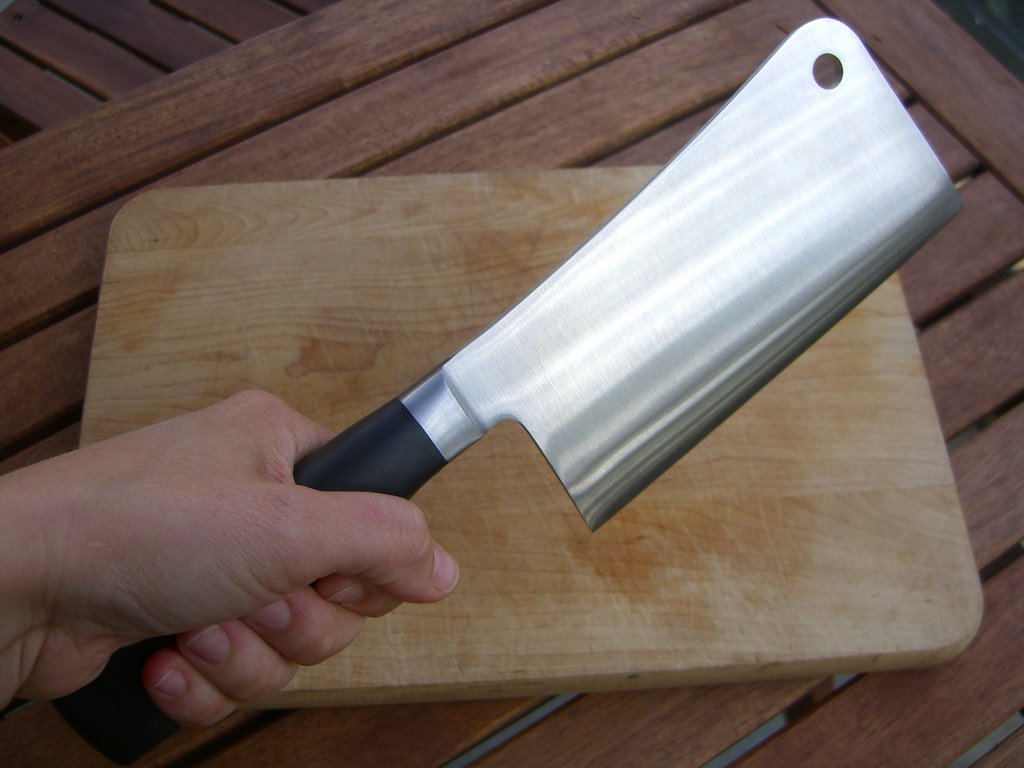
1 new shiny meat cleaver + 6 discarded chicken backs = liquid gold

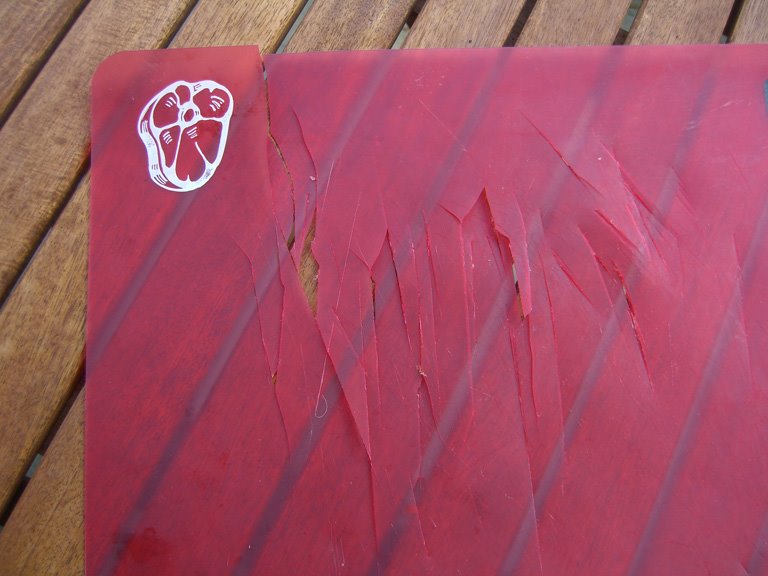
Why didn't anyone tell me how enjoyable it is to wield a meat cleaver? At first, I was timid and it took a few chops to make it through the bone. But then I moved my hand farther back on the handle and extended my swing and... BOOM goes the dynamite! I could chop all day. Unfortunately, my plastic cutting mat wasn't up to the challenge - see exhibit A.
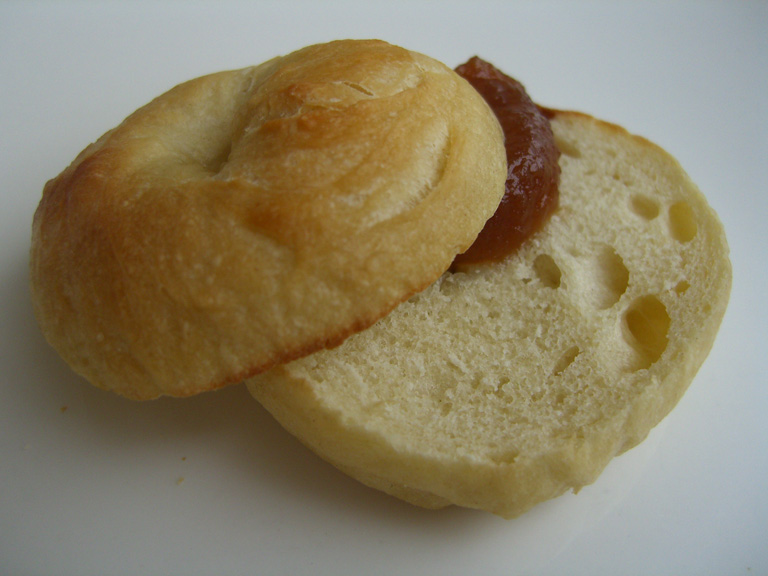

exhibit A

I specifically bought the cleaver so I could make chicken stock. I'm as lazy as the next cook, so I usually use canned chicken broth. But it's not available in here, or at least I haven't found any yet. Apparently everyone here uses instant bouillon. I admit that canned chicken broth is not great, but bouillon? Perhaps I'm being a food snob, but isn't instant bouillon just chicken-flavored chemical-ridden salt dust? Perhaps you're asking the same questions I ask myself every time I make a soup, stew, or sauce:

  • Has canned chicken broth not yet crossed the Atlantic?
  • Or do people here simply prefer instant bouillon to stock?
  • Or do they not cook things that require stock?

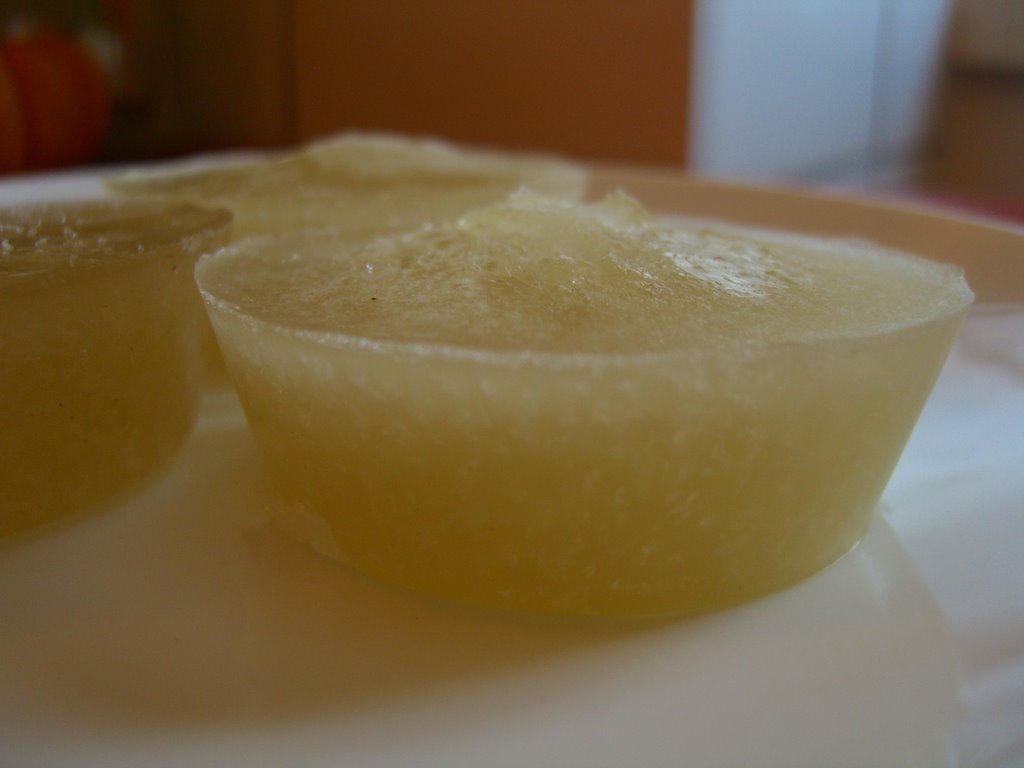
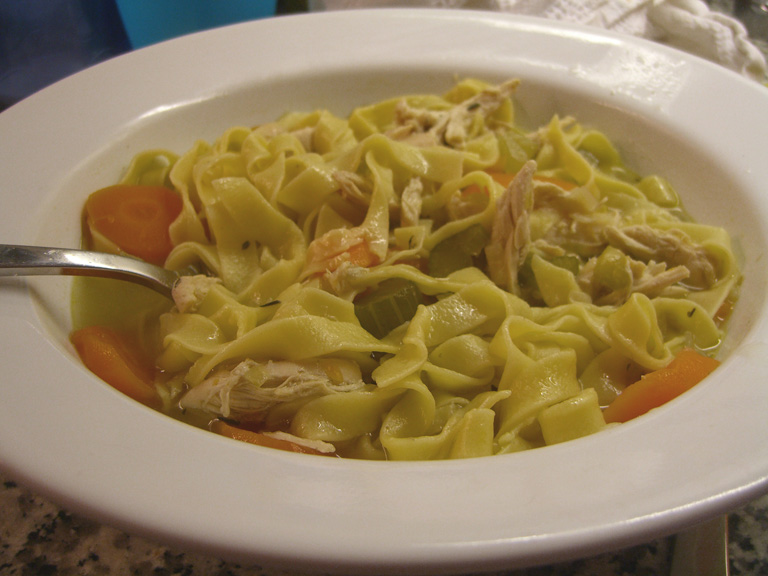
I've resolved to end my year of cooking with instant bouillon and make my own chicken stock. This journey began by saving and freezing the backs of each Chicken Marbella chicken I cut up. Six short weeks later my freezer was full and I was ready to attempt alchemy. No drama here - it was easy, quick, and tasty. I used half of it to make chicken noodle soup (I even made my own noodles - woohoo for me). Then I froze 1/4 cup portions in muffin tins so I can defrost only as much as I need. Now I'm all ready for cold weather cooking. I just need a bigger freezer.


solid gold ... chicken noodle soup

Some helpful distinctions:

  • stock - made with more bones than meat, which results in a fuller body than broth. Best for sauces.
  • demi-glace - stock than has been drastically reduced (10-15% of original volume). Good for gravies and sauces.
  • broth - made with more meat than bones, resulting in a fresher flavor but less body than stock. Ideal for soups.
Quick Homemade Chicken Stock from Cook's Illustrated
This stock can be refrigerated in airtight containers for up to 4 days or frozen for 4 to 6 months. Makes about 2 quarts

1 tablespoon vegetable oil
1 medium onion , chopped medium
4 pounds whole chicken legs or backs and wingtips, cut into 2-inch pieces
2 quarts water (boiling)
1/2 teaspoon table salt
2 bay leaves

1. Heat oil in large stockpot over medium-high heat until shimmering; add onion and cook until slightly softened, 2 to 3 minutes. Transfer onion to large bowl. Brown chicken in two batches, cooking on each side until lightly browned, about 5 minutes per side; transfer to bowl with onions. Transfer cooked chicken to bowl with onion. Return onion and chicken to pot. Reduce heat to low, cover, and sweat until chicken releases its juices, about 20 minutes. Increase heat to high; add boiling water, salt, and bay leaves. Bring to boil, then reduce heat to low; cover and simmer slowly until stock is rich and flavorful, about 20 minutes, skimming foam off surface, if desired.

2. Strain broth and discard solids. Before using, defat stock. After stock has been refrigerated, the fat hardens on the surface and is very easy to remove with a spoon. To defat hot stock, we recommend using a ladle or fat separator.

Tuesday, October 10, 2006

It's a happy day...


...when your 2.5 yr old
chows down 50 grams
of Fourme d'Ambert
and asks for more.
Related Posts Plugin for WordPress, Blogger...